Archive for the ‘Mods & repairs’ Category
Well last year at some point I must have dropped it. Managed to pull or pop one of the two receiver to stock bolt holes and stripped it smooth. Buggrit.
Asking the brain pool (derks and Jamie?) for advice we came up with tapping out and reinforcing. There isn’t enough depth of metal to use thread savers etc so a new hole was needed.
My engineering skills are fairly limited and my tools mostly ‘acquired’ and therefore incomplete but I do have an M4 tap and an adjustable spanner. So the hole was drilled, tapped and cleaned. And it was straight!
To reinforce I bolted the new receiver bolt in with a nut on. This was wound down and epoxied in place to lengthen the thread. The stock needed a touch of dremmeling to seat the receiver properly.
Works quite well and has held for at least one game day…..

If you are trying a new inner barrel don’t forget to give it a clean first. It’s much easier off the gun but also very necessary. Just because it’s new doesn’t mean it’s clean!
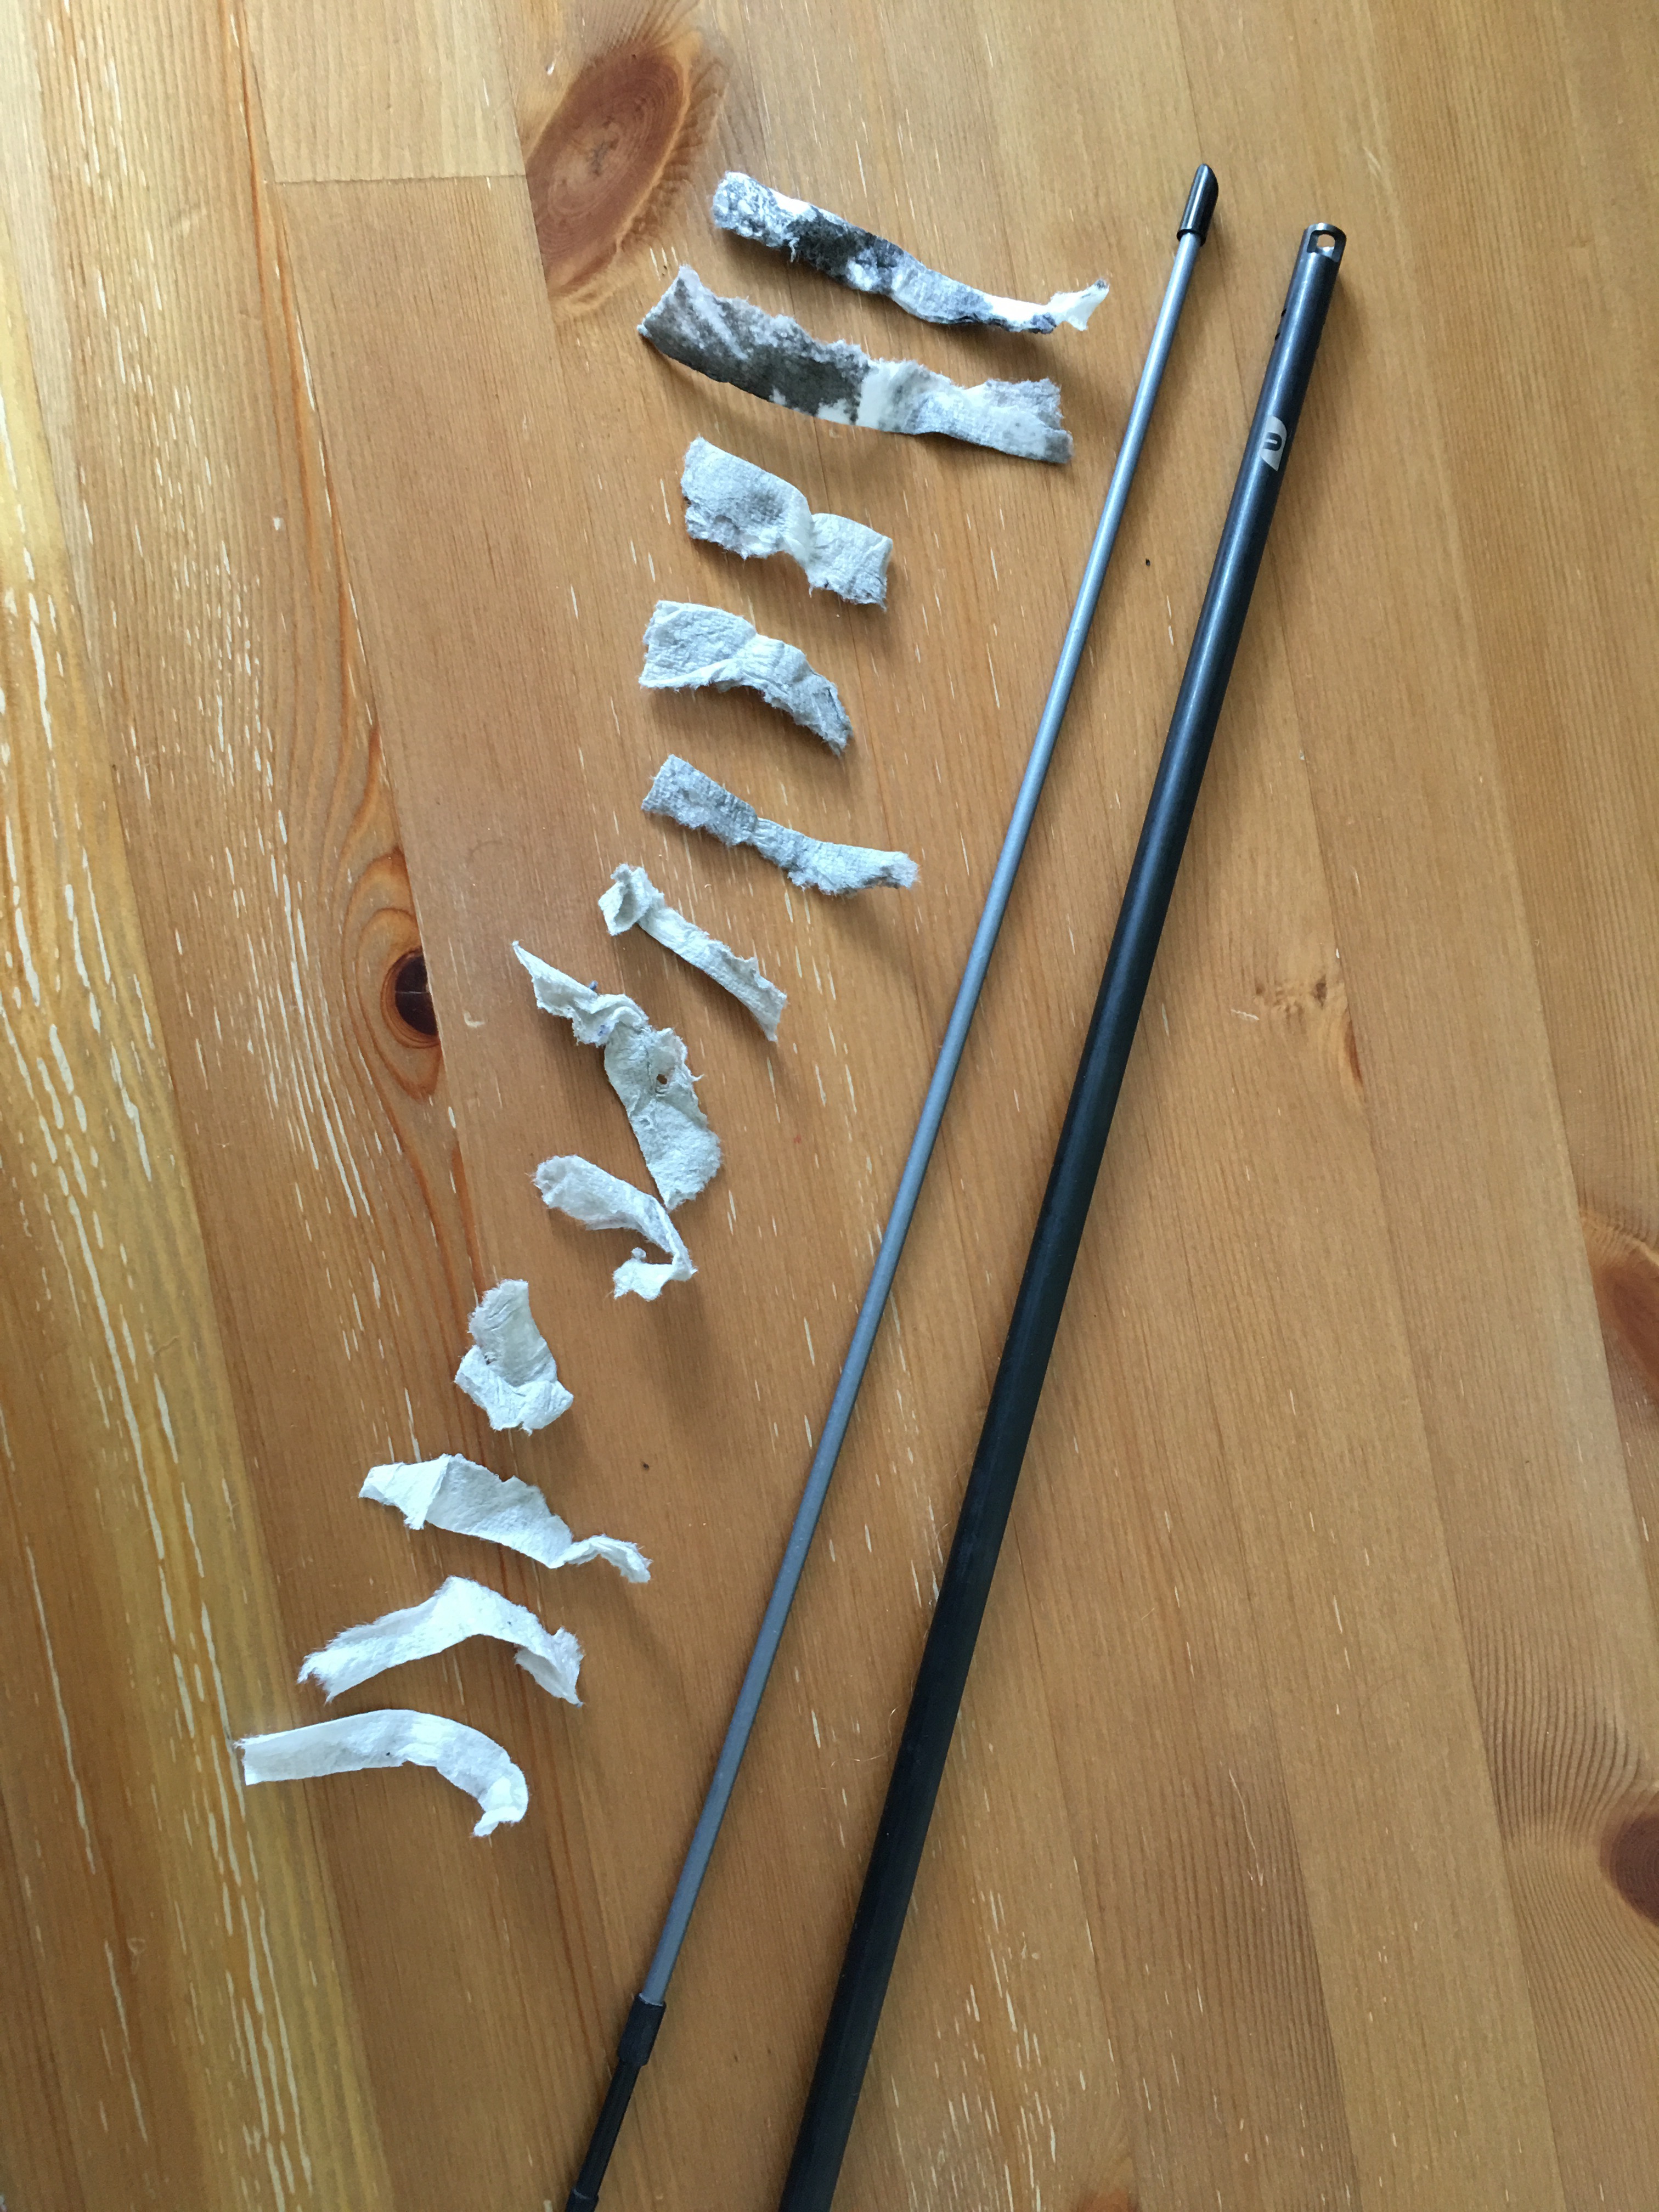
Still needs a clean though….
Well it seems this last year has seen the Raptors once again go all vain and interesting. Not content with Flecktarn pattern as the BDU of choice, I finally decided to get some ATACS FG kit now that it’s available over here and not silly money. I like MTP, Multicam types but never enough to buy it. That and most airsofters use it nowadays so the raptors obviously avoid it like the fashion faux pas that it is.
Looking at images of FG on the net it looks deceptively woolly and vague which I really like. So the plunge was plunged. New BDUs and a rig with, for once matching pouches, bladder carrier and holster. Oooooh go on sir. Suits you.
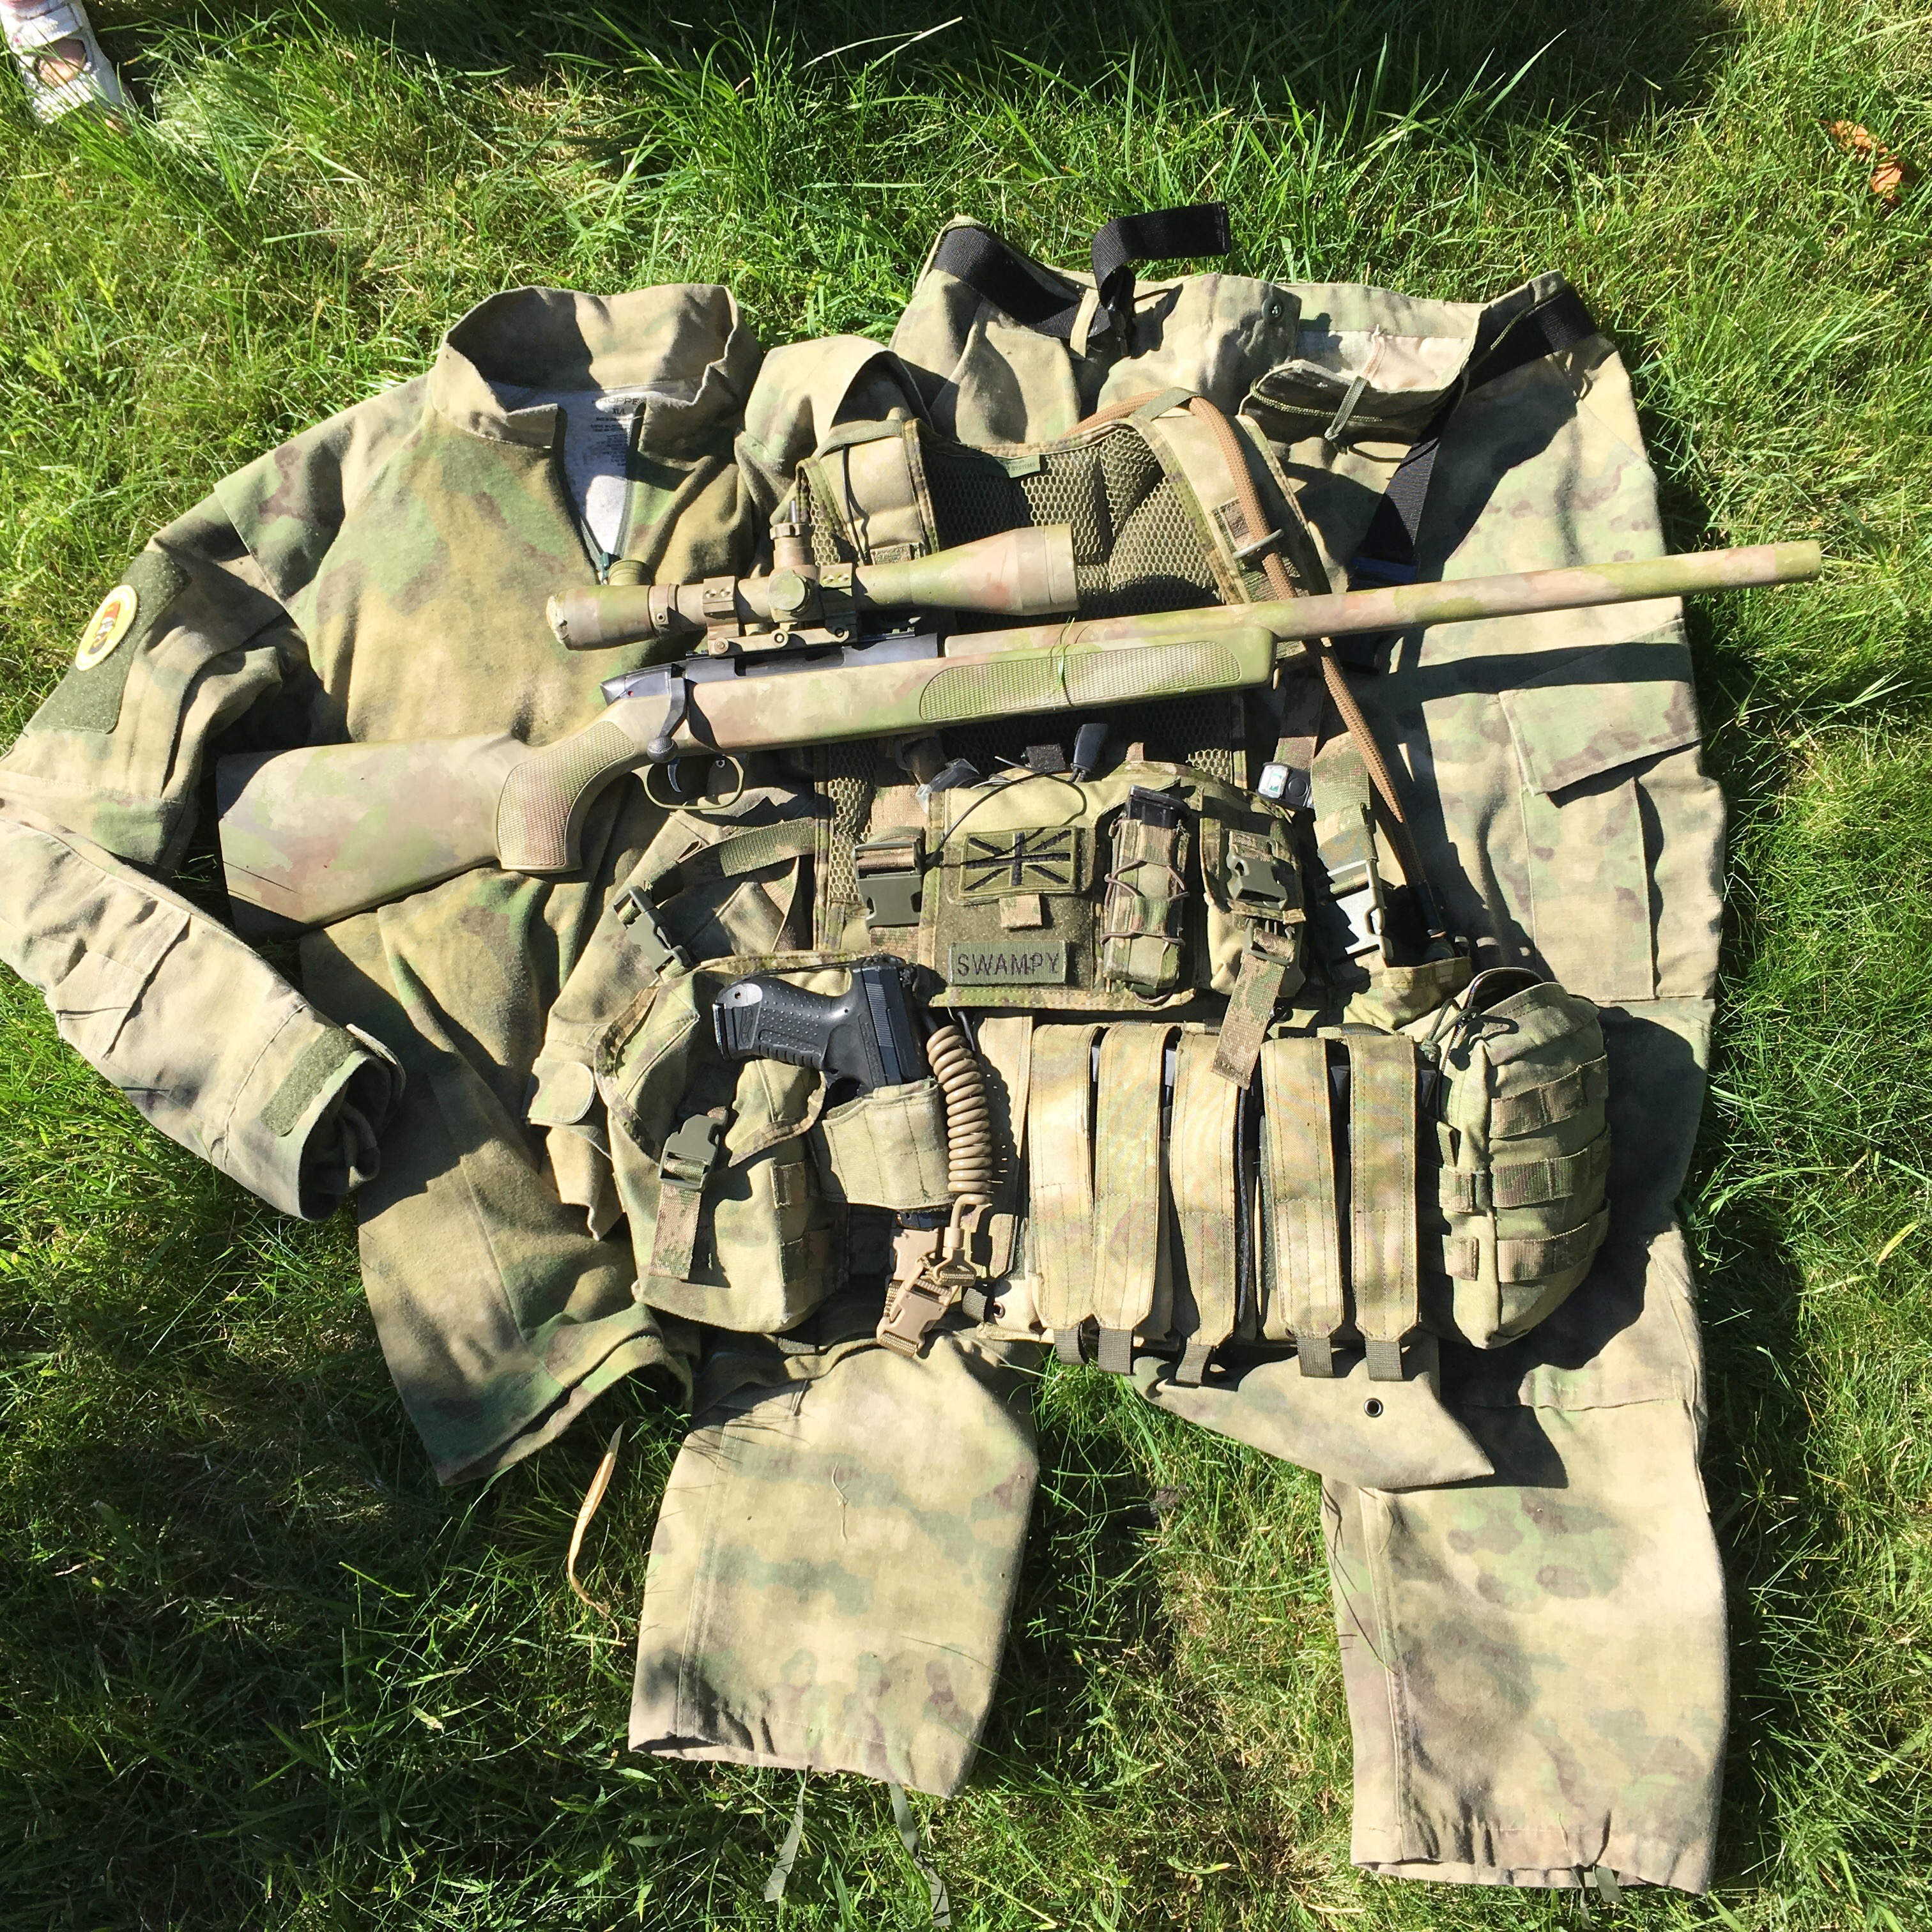
What’s it like in the field? Well I bought Propper BDUs as I’ve always liked them. Spider bought cheaper stuff, went all stunt man and ripped the arse out of his. Not a bad repair to do but still having the two sets up close I’m glad I splashed out a bit as I don’t imagine we’ll be changing pattern for a bit so it needs to last.


In terms of colour fastness if you know the raptors you’ll know the BDUs never get washed. [yeah but seriously mate, those pants are starting to reek…. spider] Ever. It’s just bad juju and shouldn’t be done. That’s right. We generally stink but are all the more awesome for it. Also keeps the foxholes clear when needed, prevents aegs from failing and keeps peasants away.
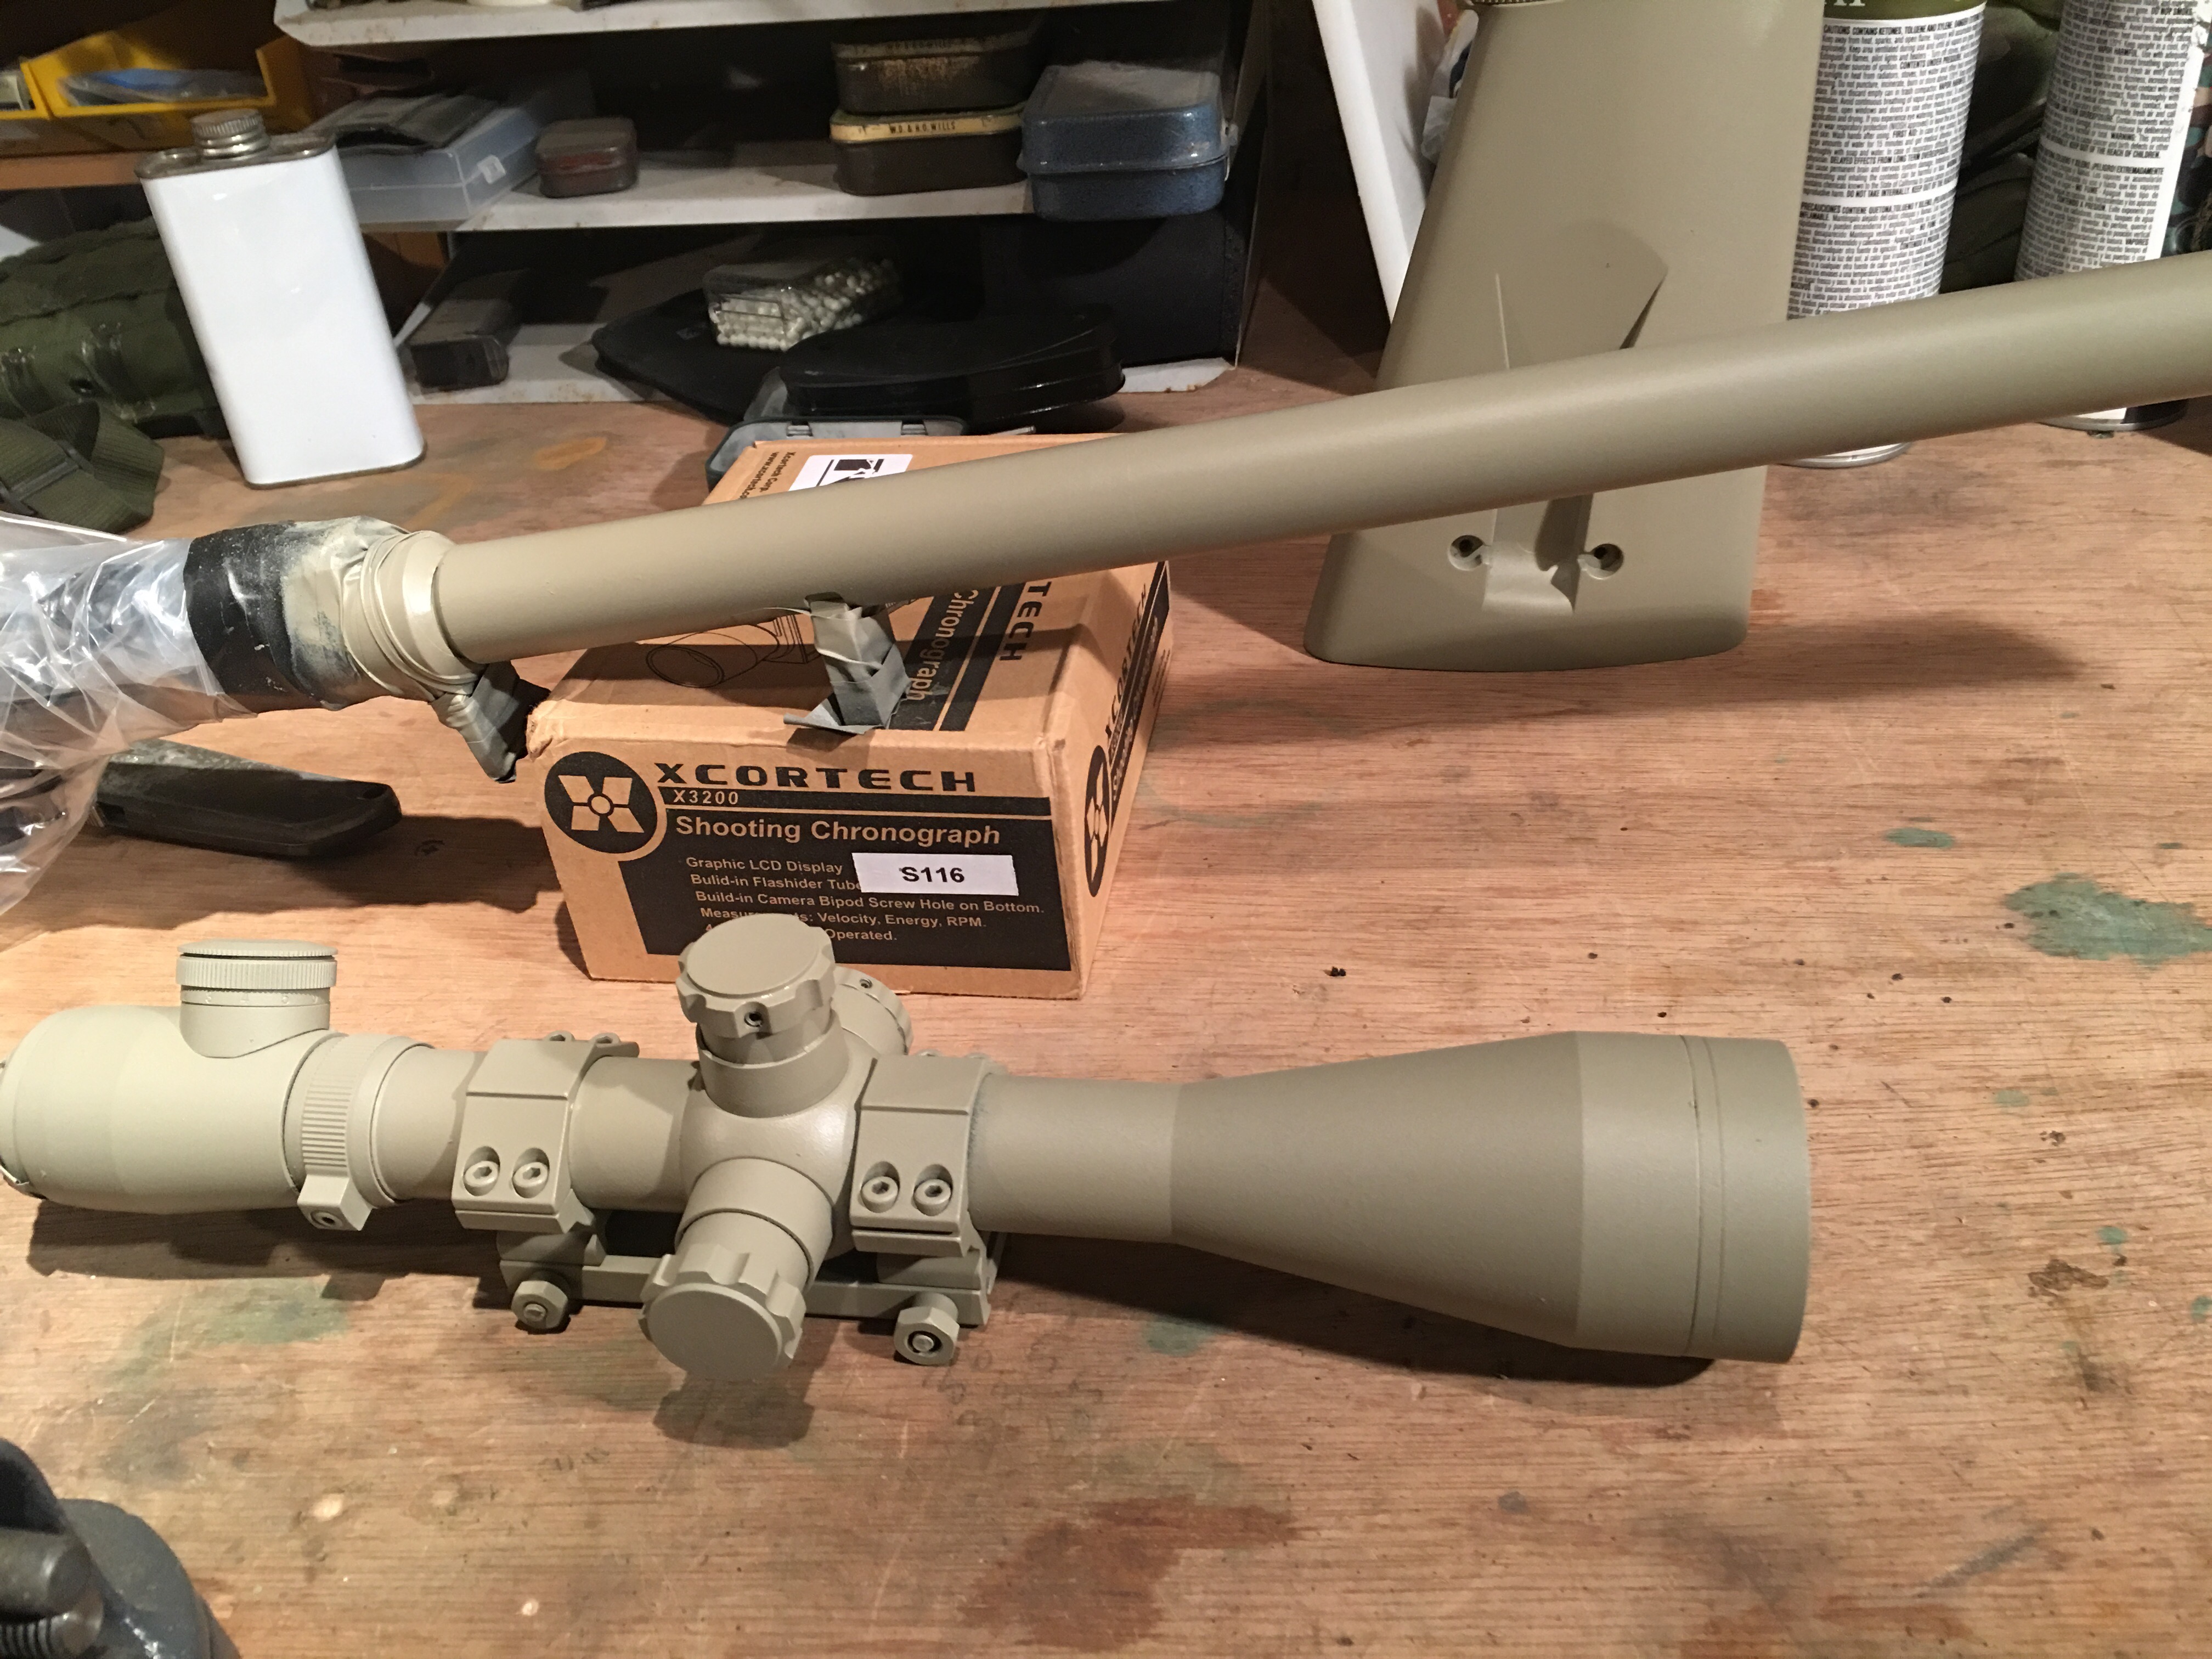
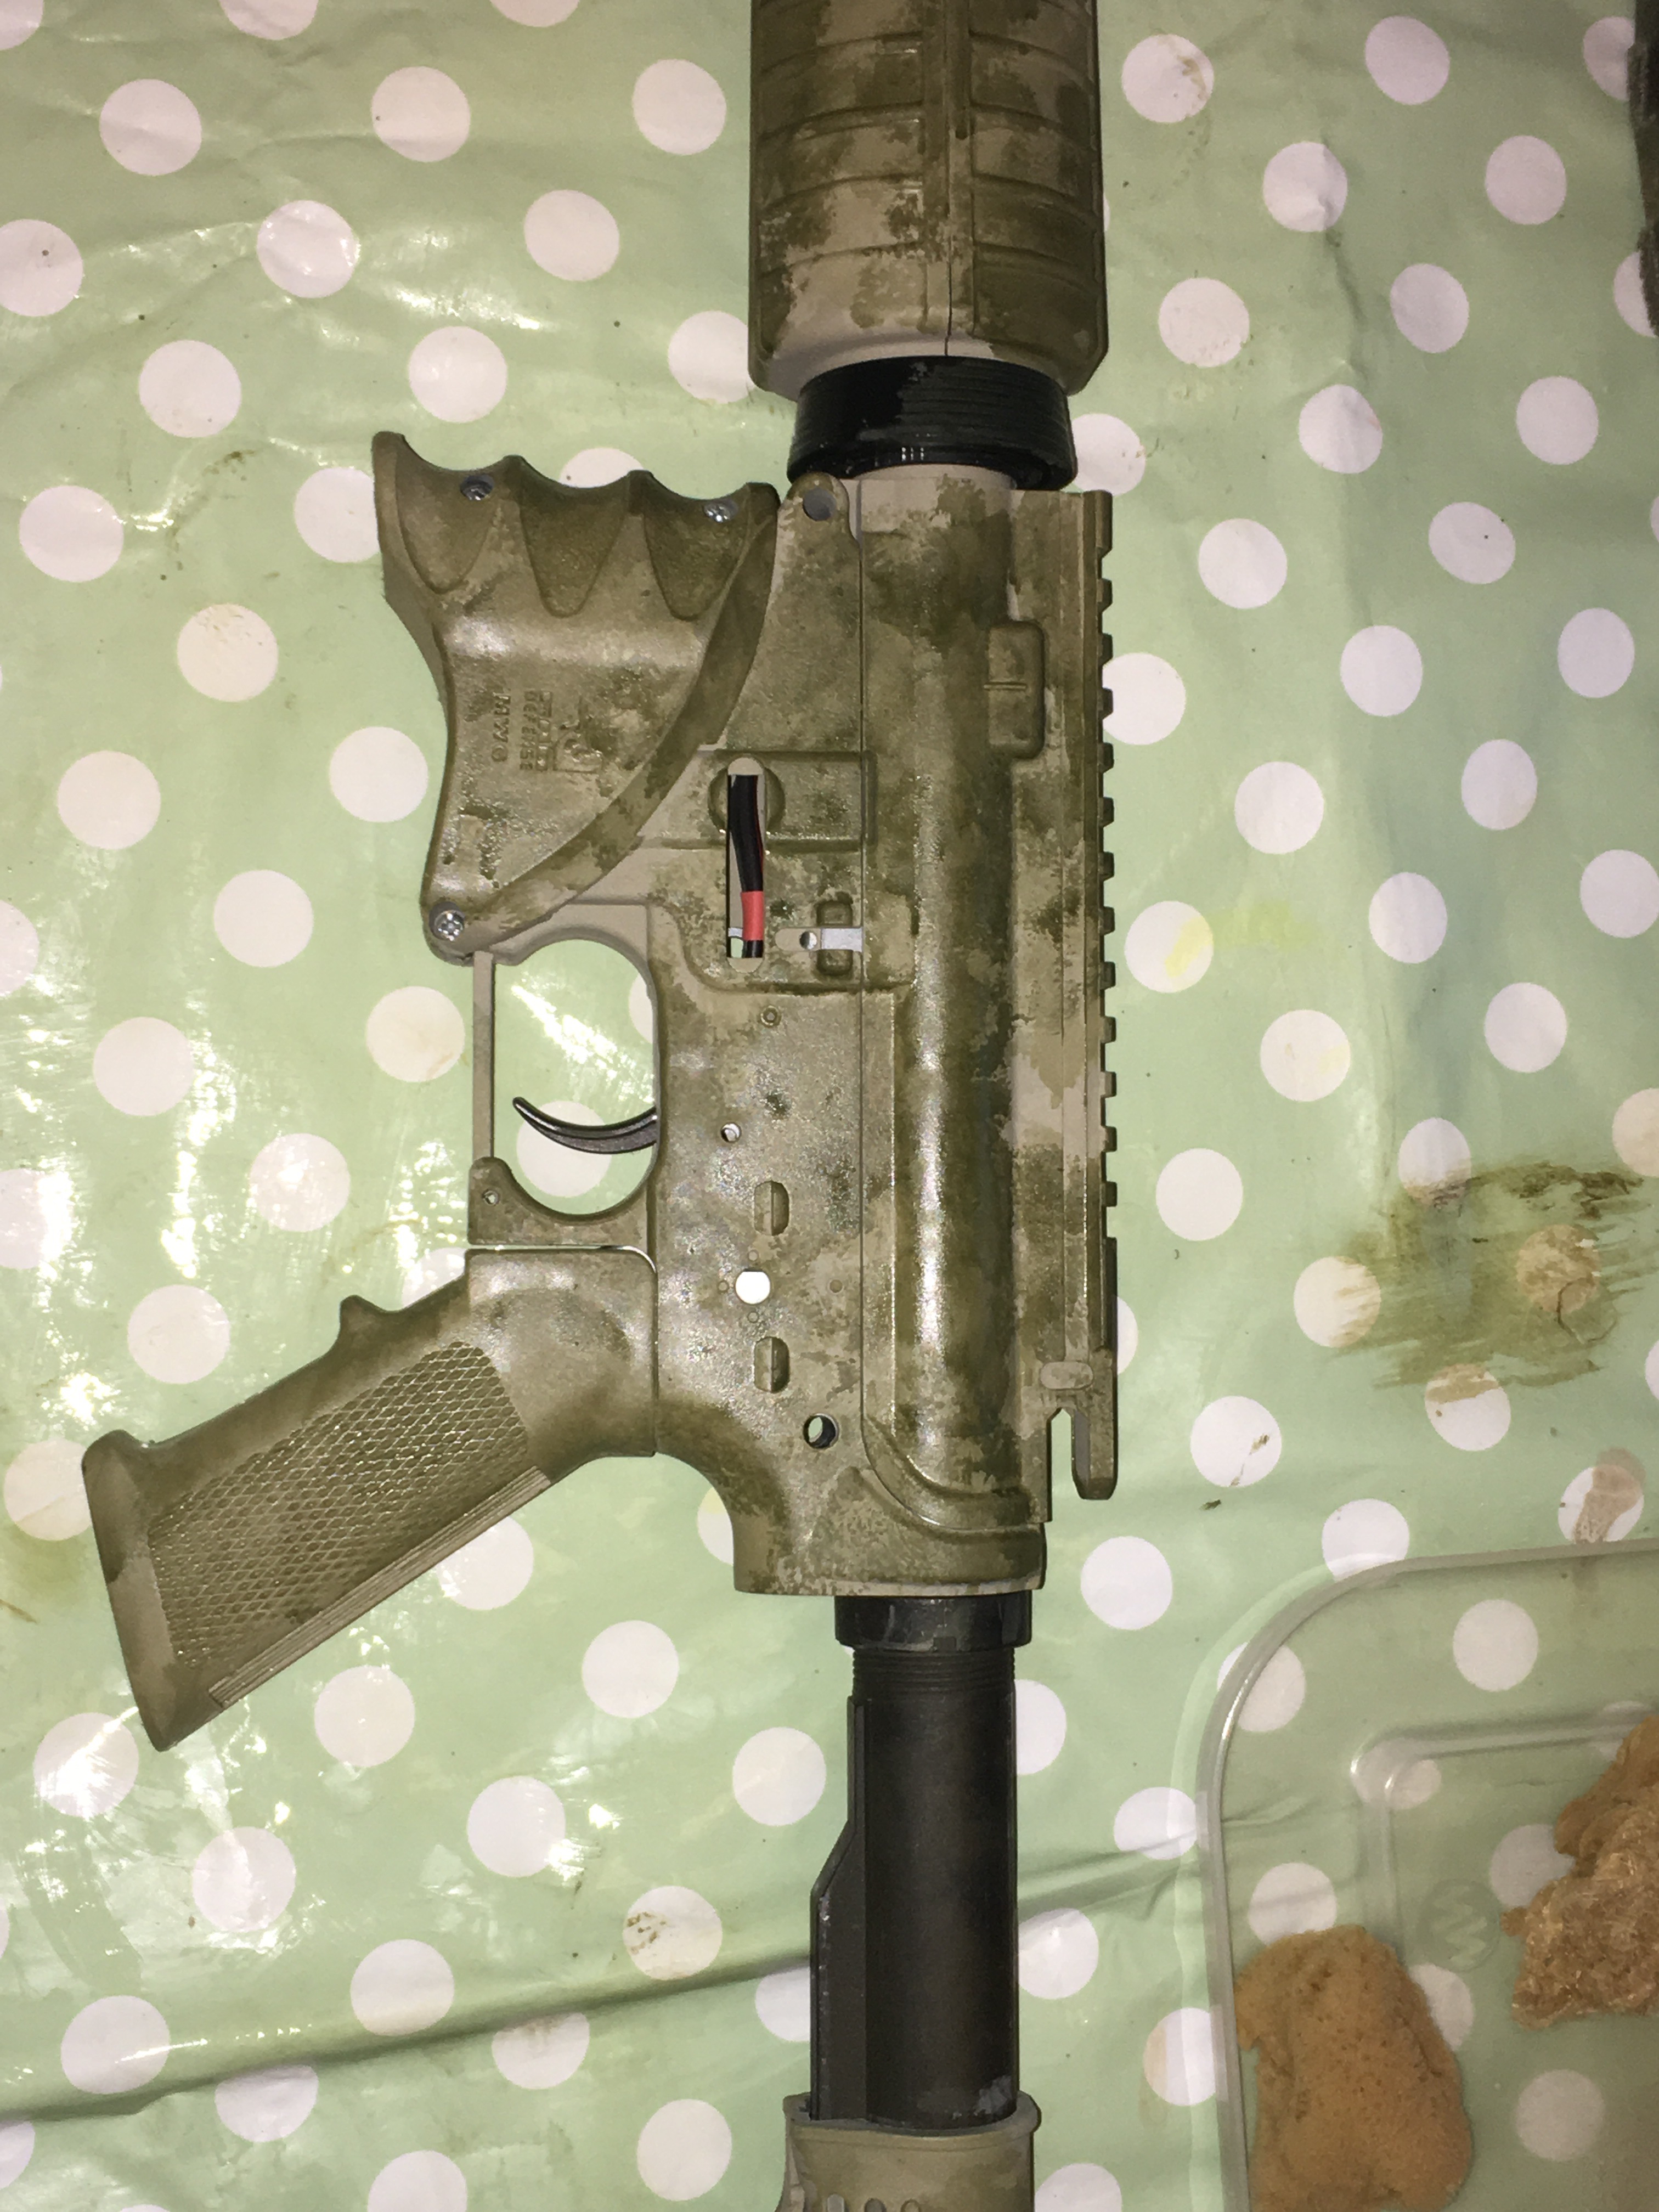
I’m alone in the team for this next part. Painting aegs. I have a penchant for skinning my guns with a paint job to match. Did it with my systema and the Marpat I wore at the time (pain in the arse to stencil and paint) and it worked out well. This time I’ve done my M4, ASP2 and will be doing my CO2 VSR when I get round to getting it off Milgeek. Might even do the ASG Scorpion. Might.
So how did I do it. Well Milgeek will be along shortly I would imagine to show you how a proper modeller does it with an airbrush and skill. Me? I got half a dozen shades of Tamiya acrylic paints approximating my boonie hat in shade and had a bash. Good place for cheap Tamiya paints and small natural sponges is hobbycraft by the way.
I Started by spraying some heavy weight notepad paper with krylon Khaki as a base to test on. It seems ATACS FG runs light to dark as far as my eyes are concerned so this will be the base coat for everything, and krylon is excellent for Airsoft needs. After that it’s daubing time with various bits of sponge and redaubing with a sponge with thinners on to lift colour off and give the watercolour effect ATACS has. Works quite well if a little less defined than the actual thing.
Repeating through increasingly darker shades finally to brown seems to fit nicely. The key seems to be working relatively quickly on partially dry previous layers to allow a little bleed between colours. Also repeating a few patches of previous colours here and there adds a bit of complexity.
A pleasant evenings work.
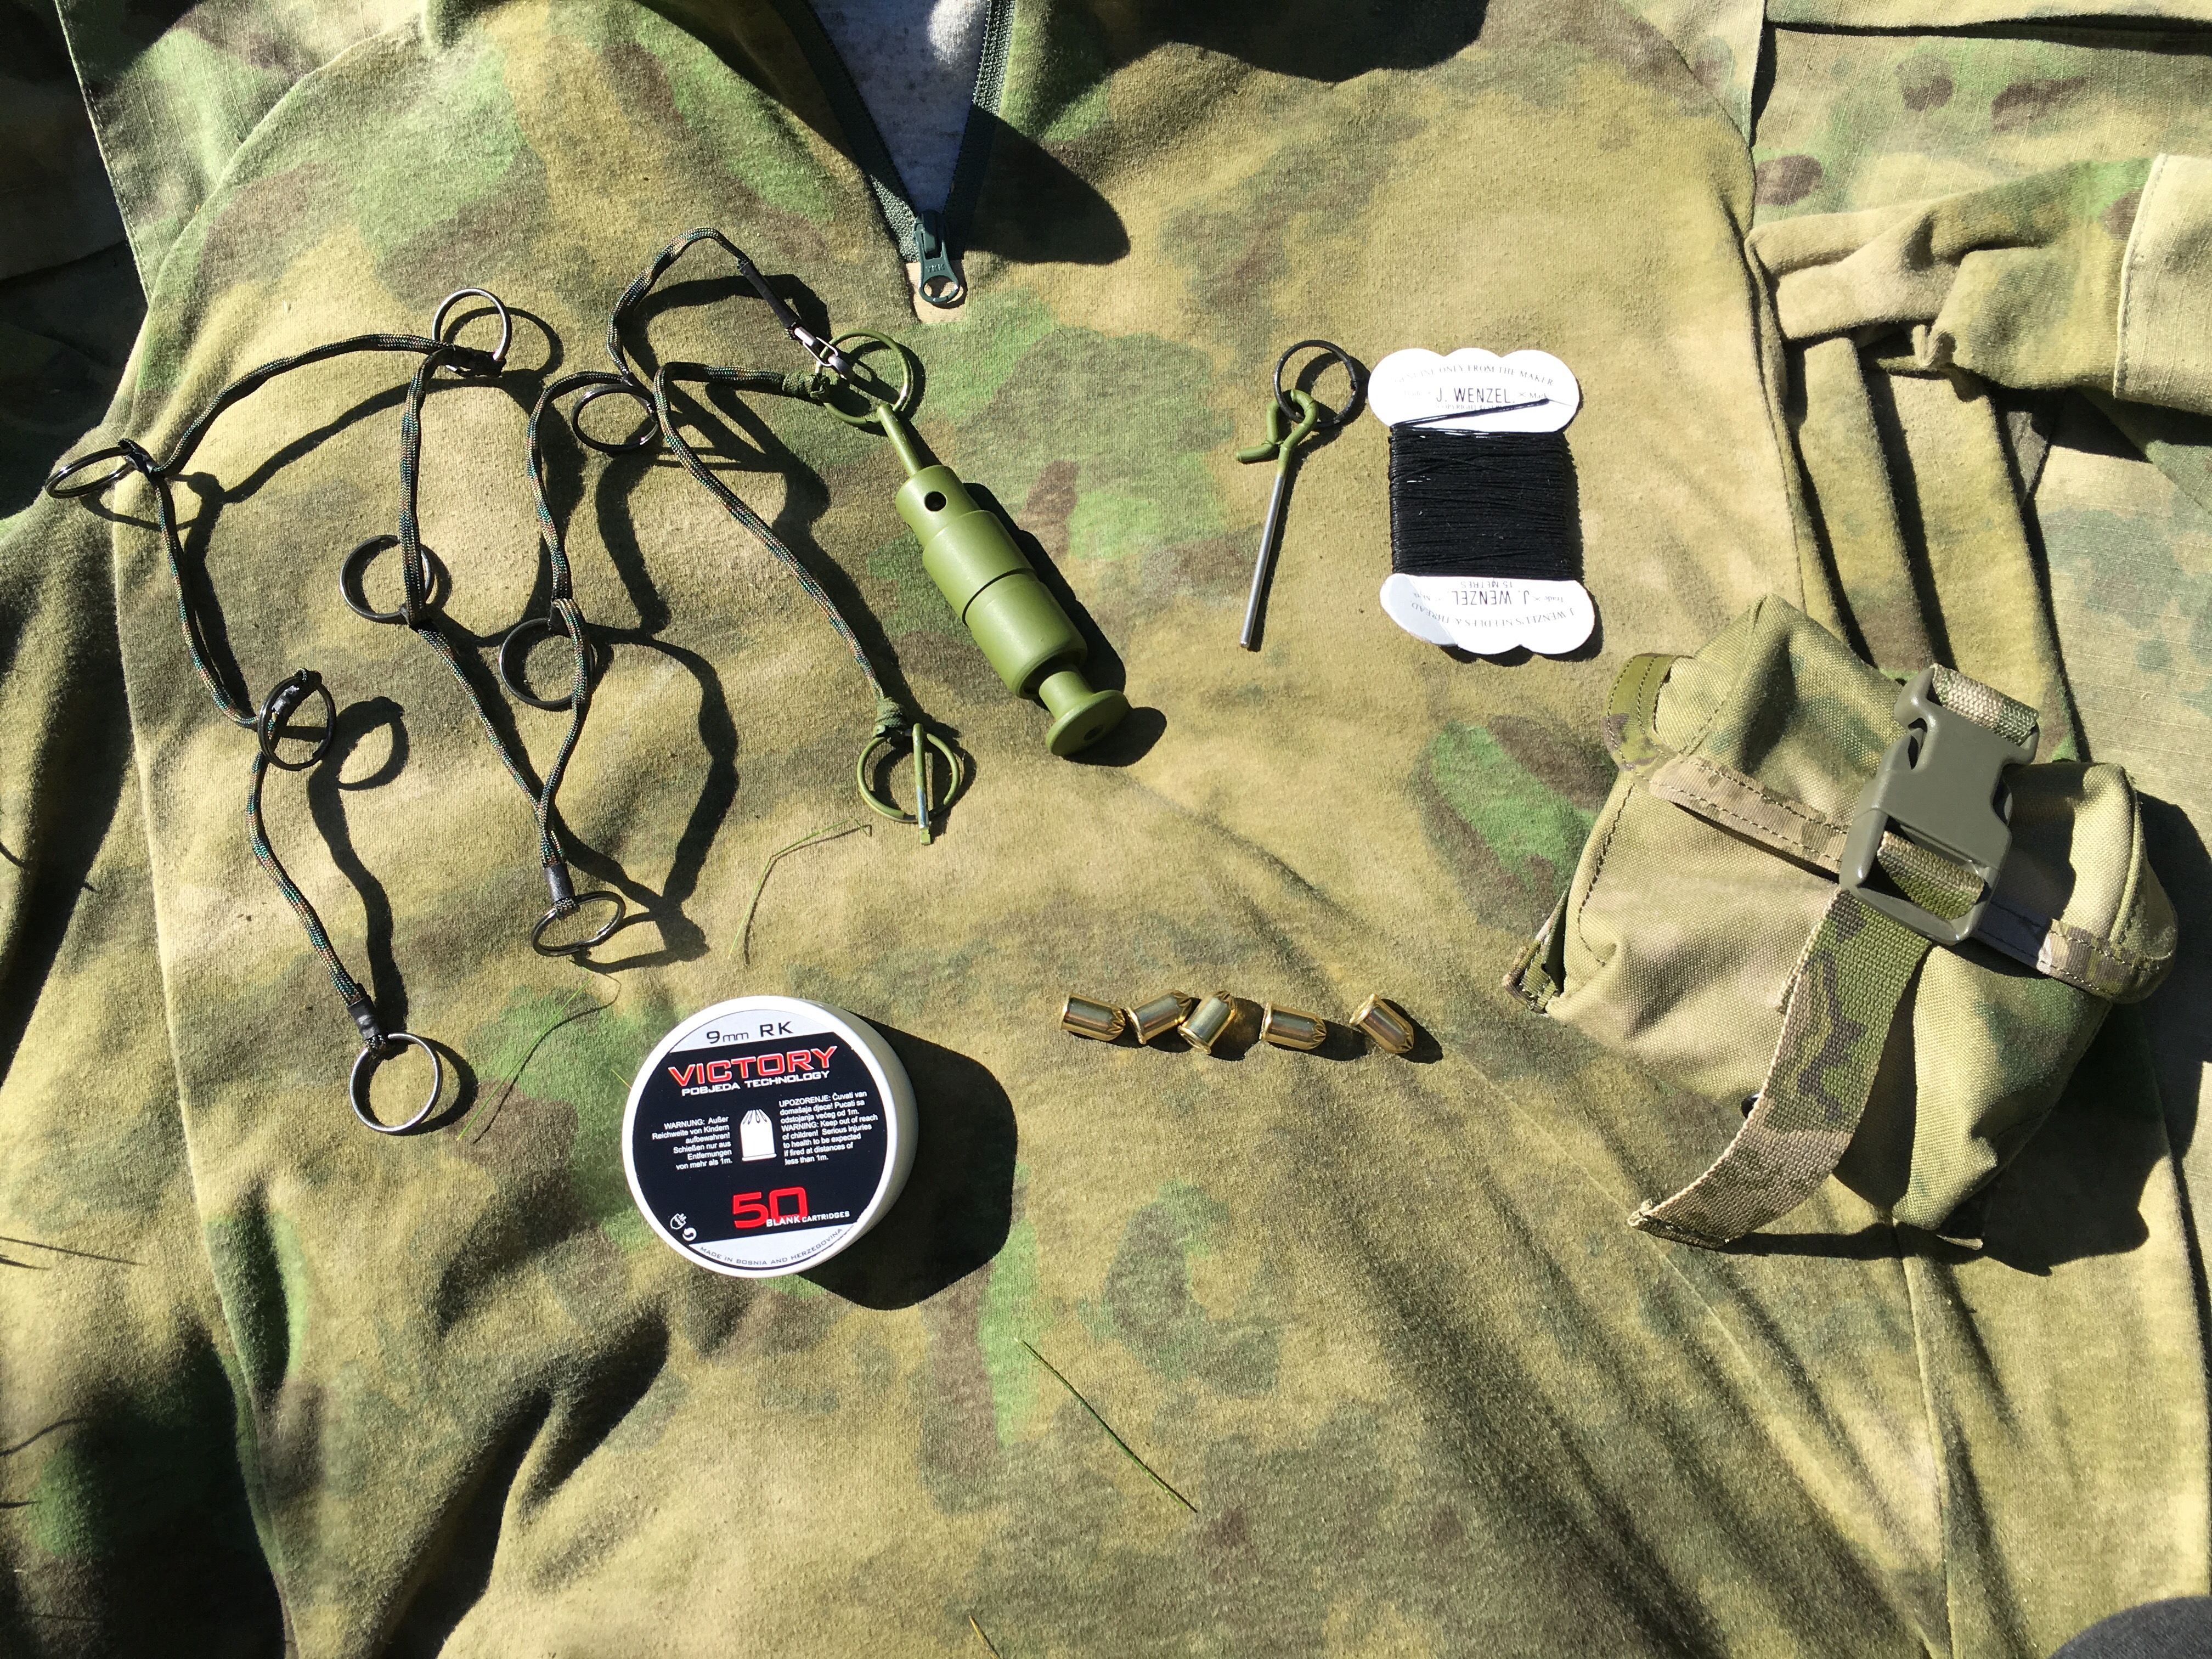
So I’ve used trip mines on and off for a few years. Had some great laughs usually with misfires whilst setting…. Spider. Never owned any myself always used spiders 12g spring loaded affairs. Very effective but arsey to set. Well for me anyway so never thought to buy any for the sake of them sitting in a drawer and not being used.
Roll on to a recent game day and Jamieraptor pulls a small cylinder and trip line out and twirls it around like a nunchuck. Always interested in shiny new stuff Jamie let me have a go.
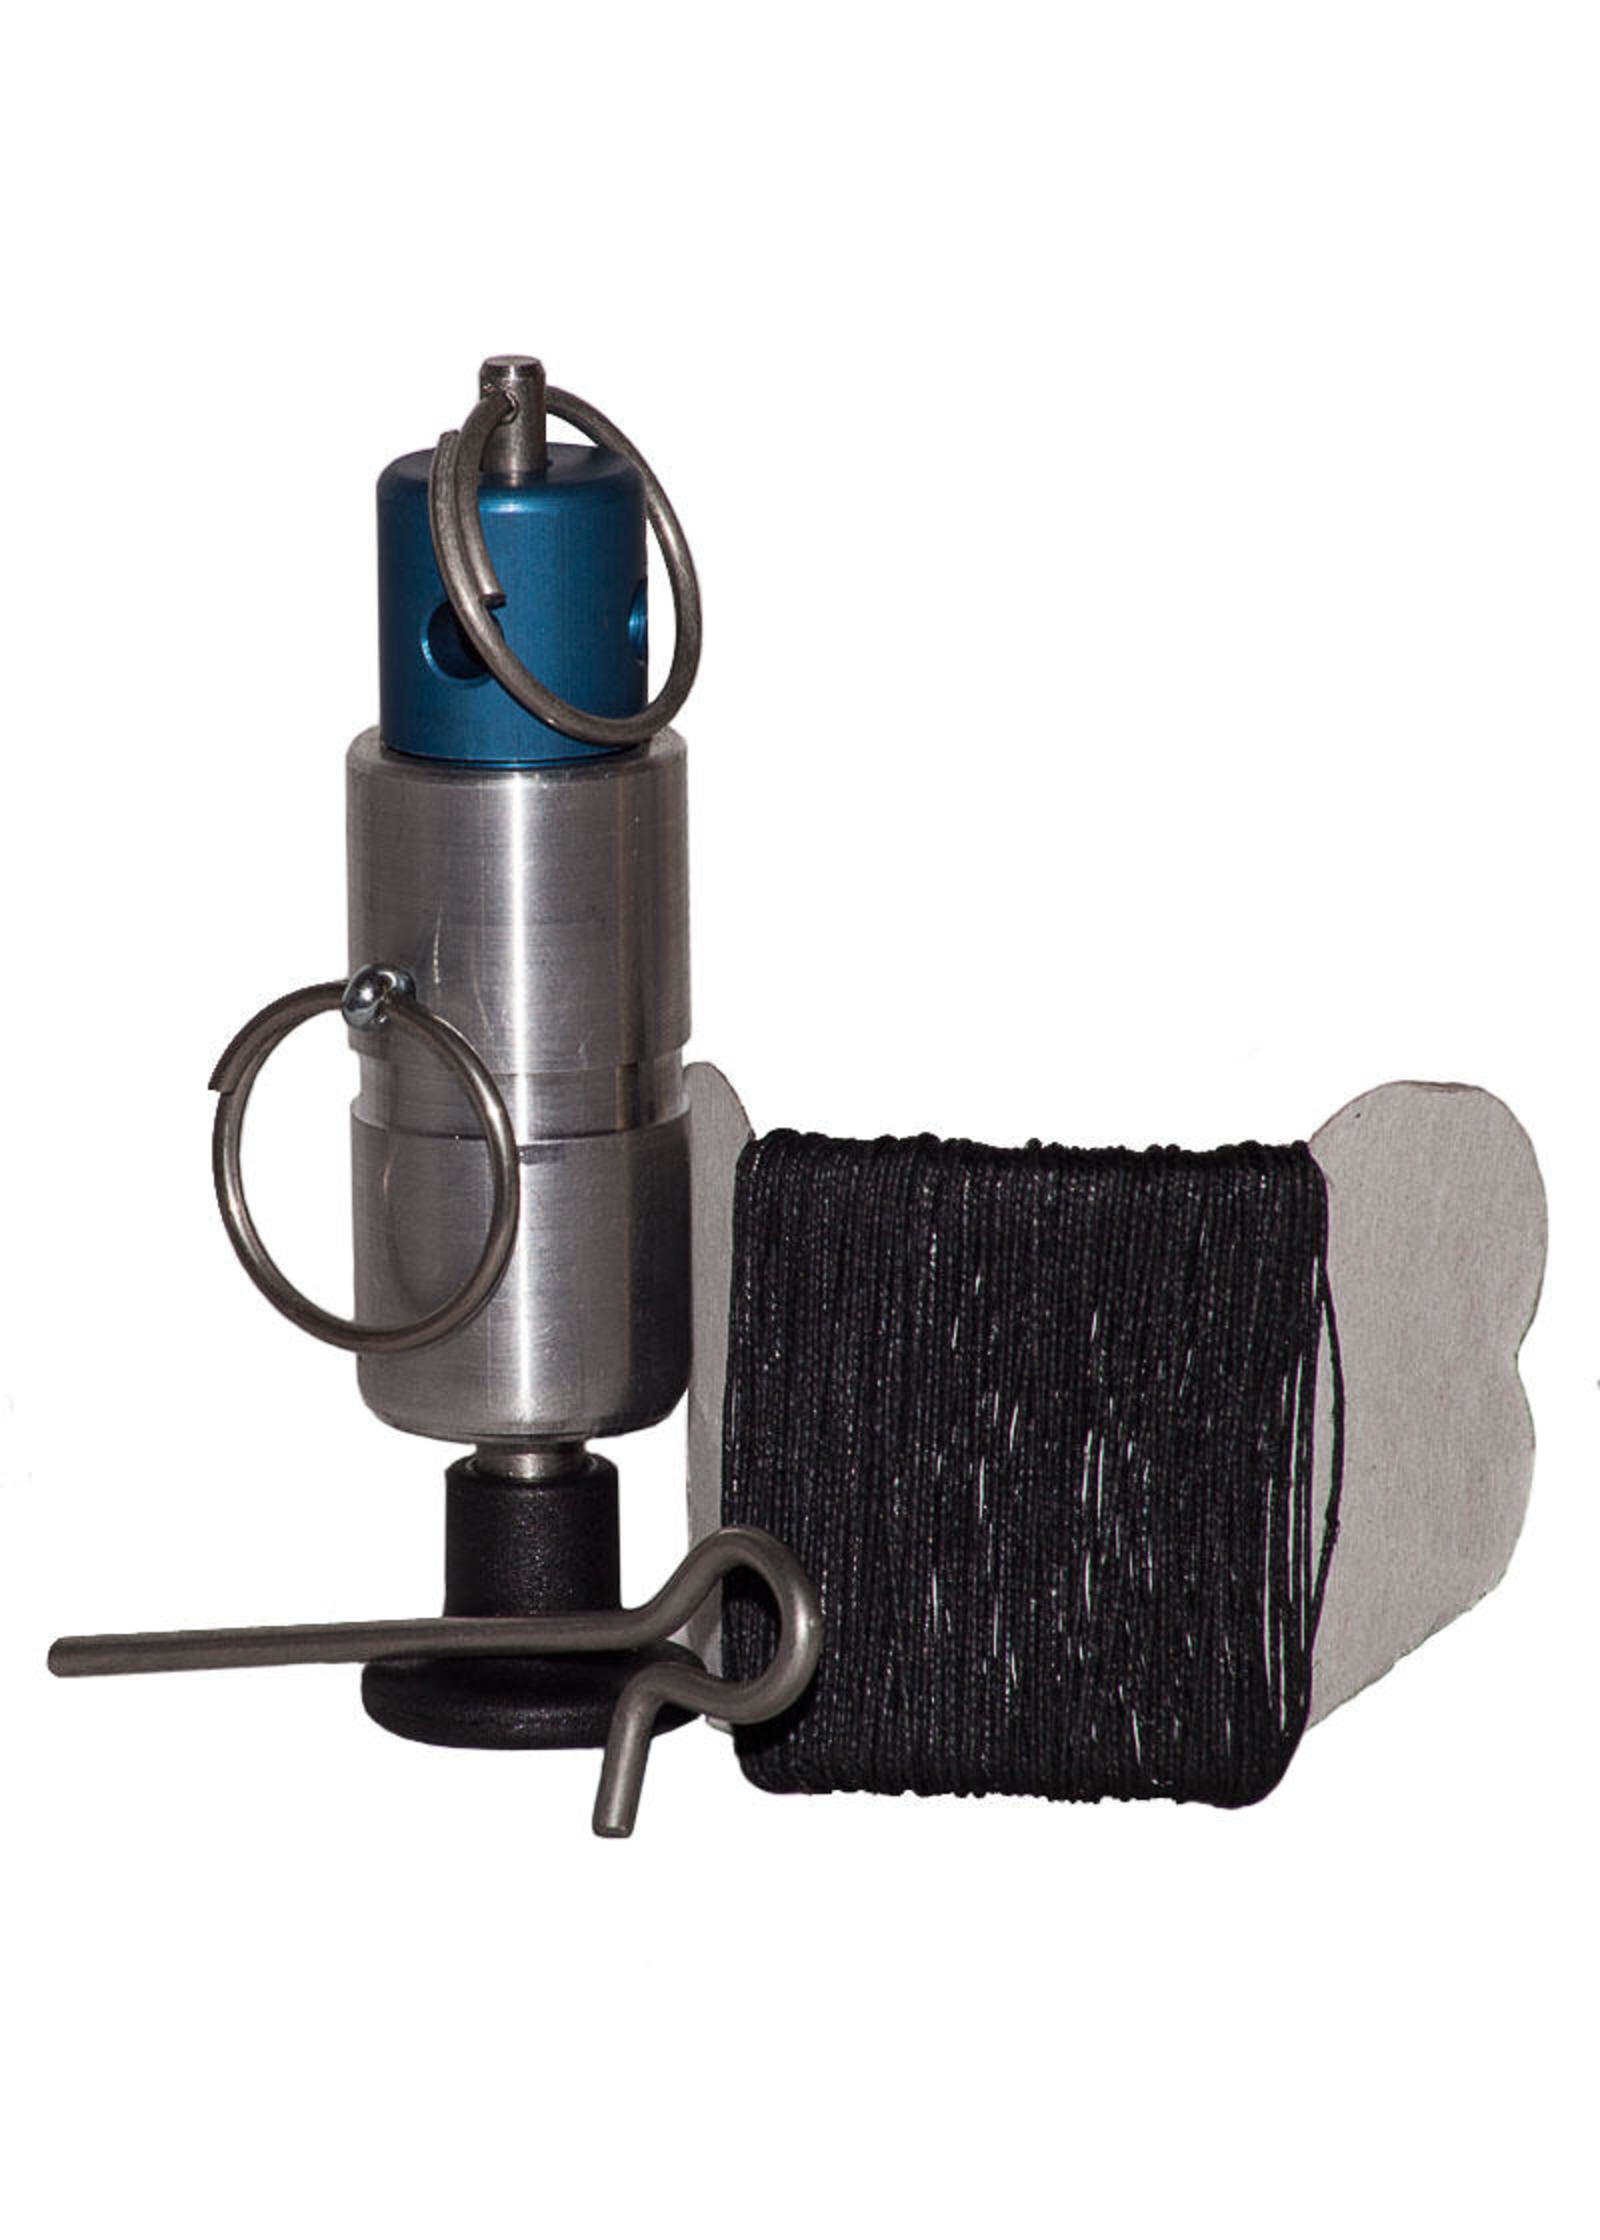
The dynatex Scaremonger is small, very easy to set yet easy to trigger , runs on 9mm blanks, is loud and has a built in safe mechanism. Bit pricey should it go missing as people have had happen but worth it all the same I think. Should be fun at the next skirmish. Sprayed mine up green as its a bit shiny and visible.
Still Airsoft never goes away even if real life is a bit busy on occasion.
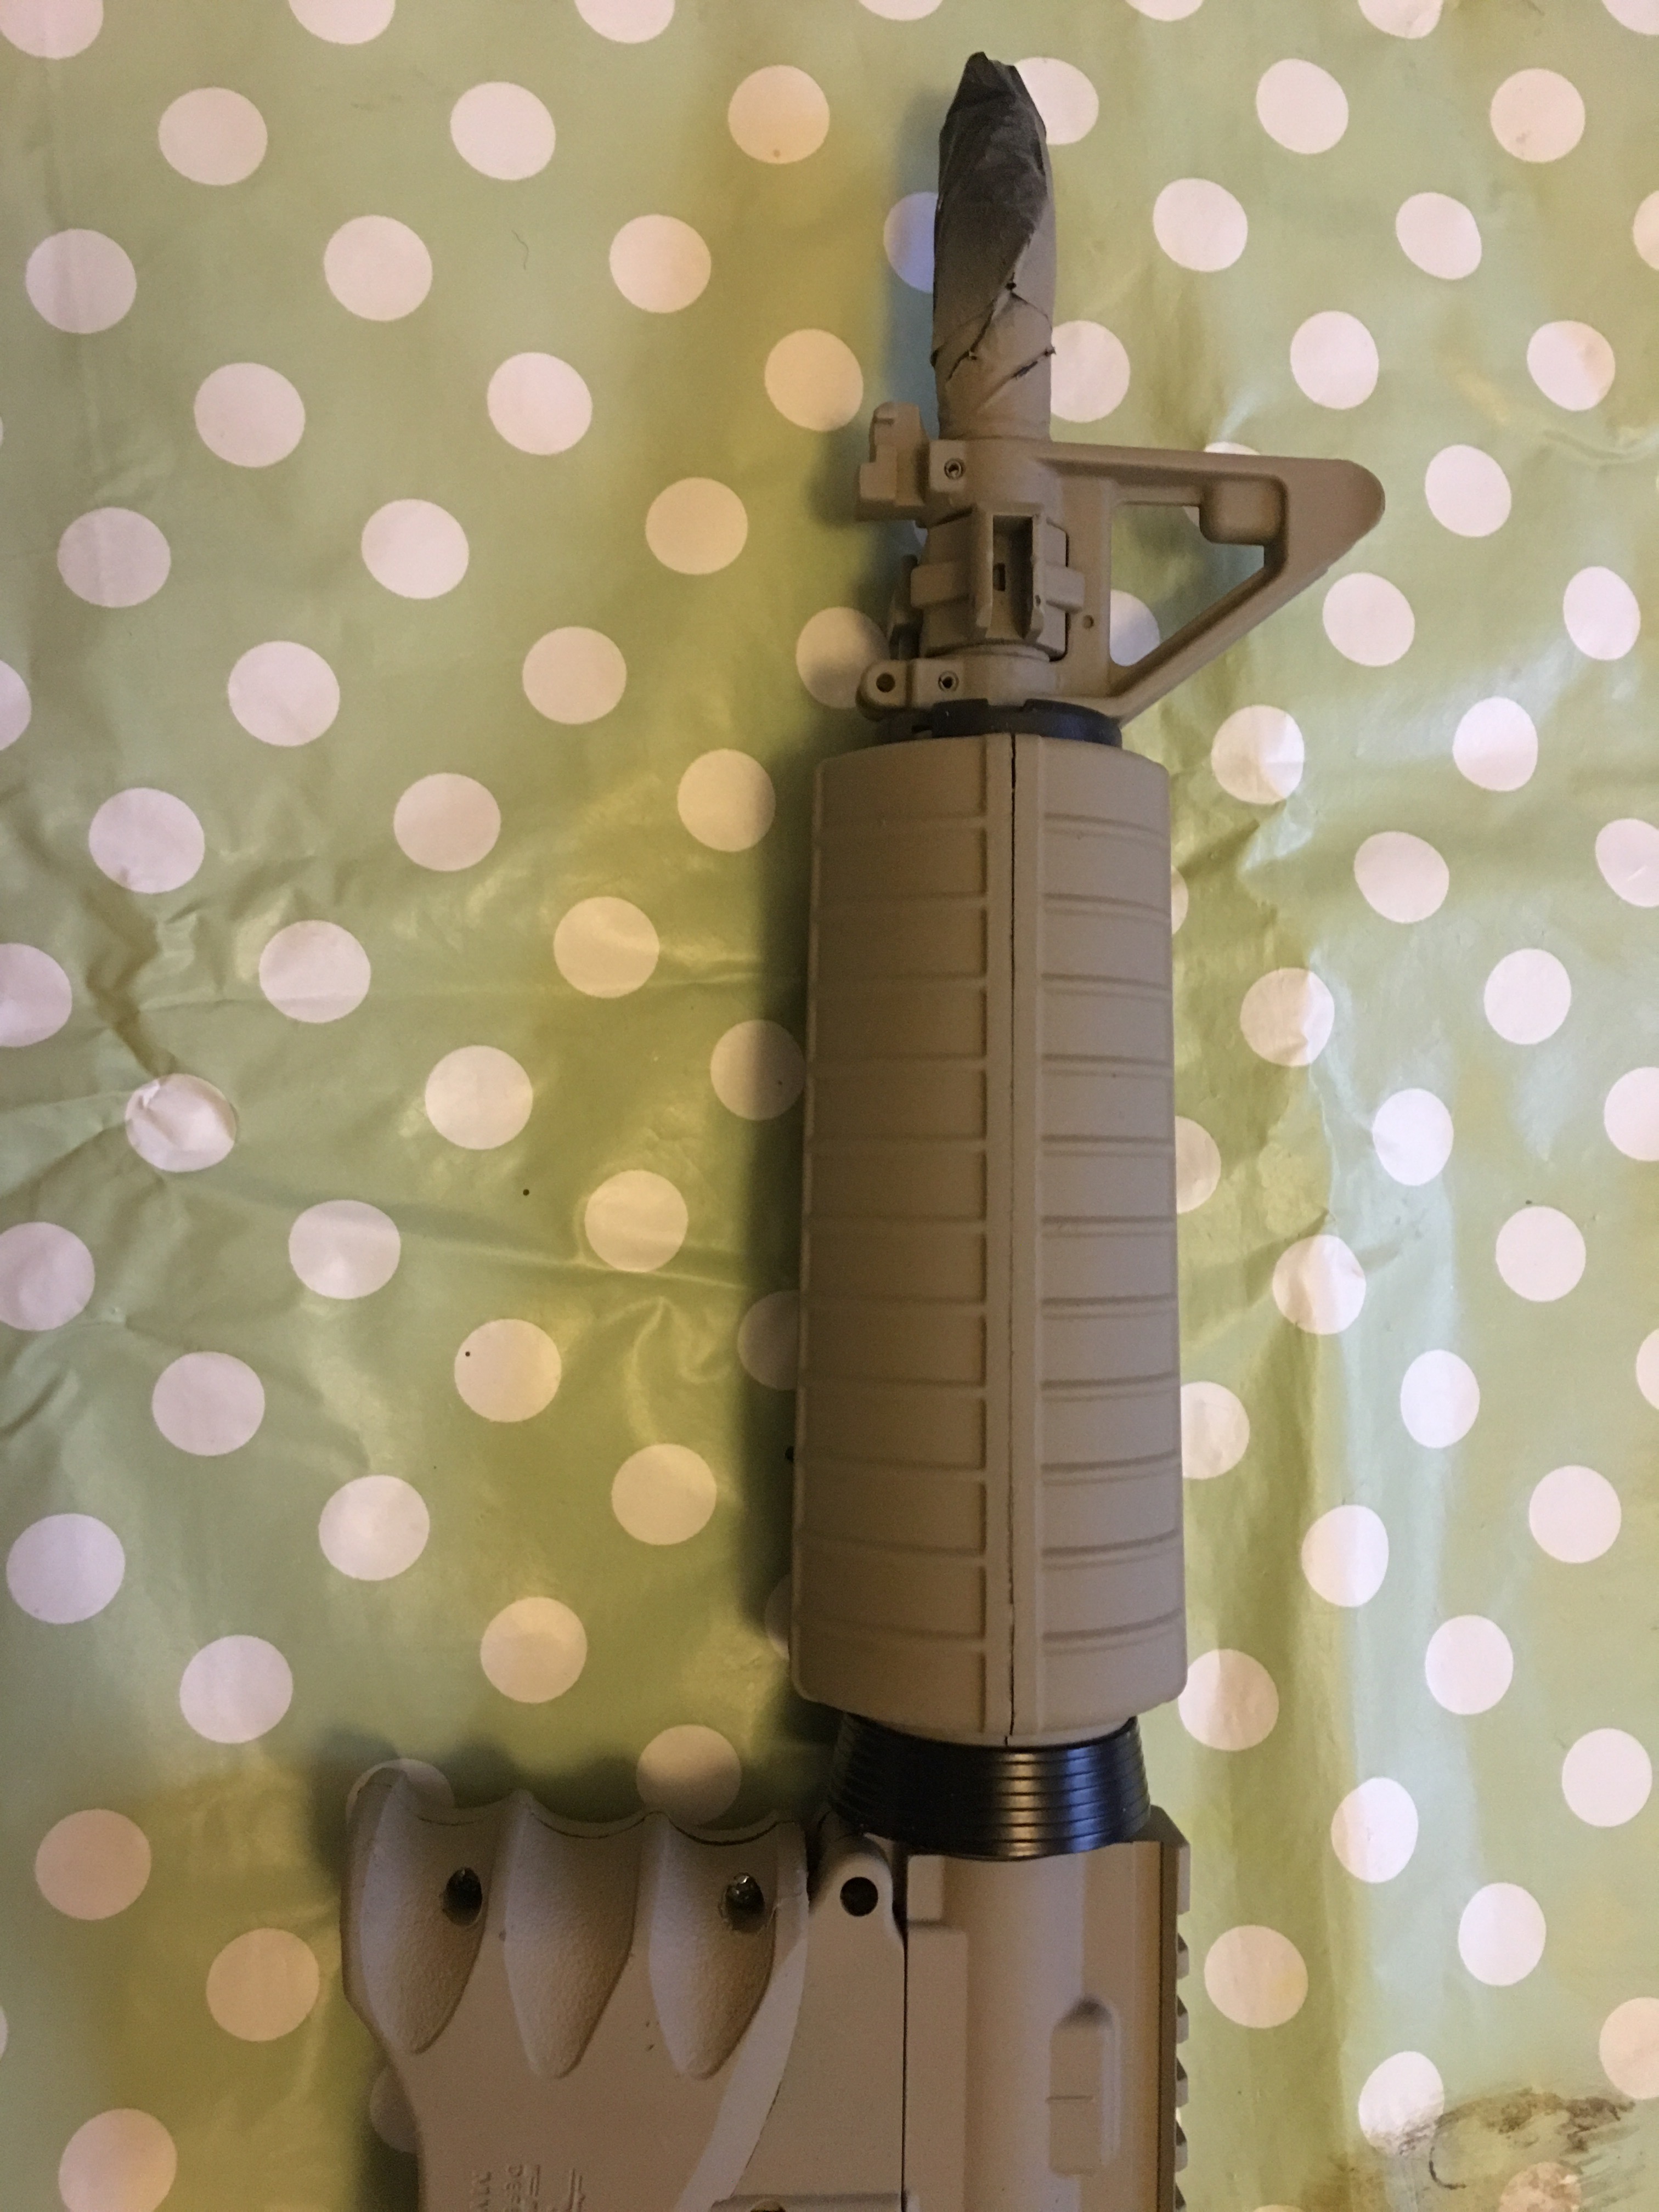
Recently started a rebuild of my SRC M4 including a paint job. Now I’ve never done a rewire so it’s a bit of a learning curve and chuck in the addition of a Gate Nano AAB mosfet
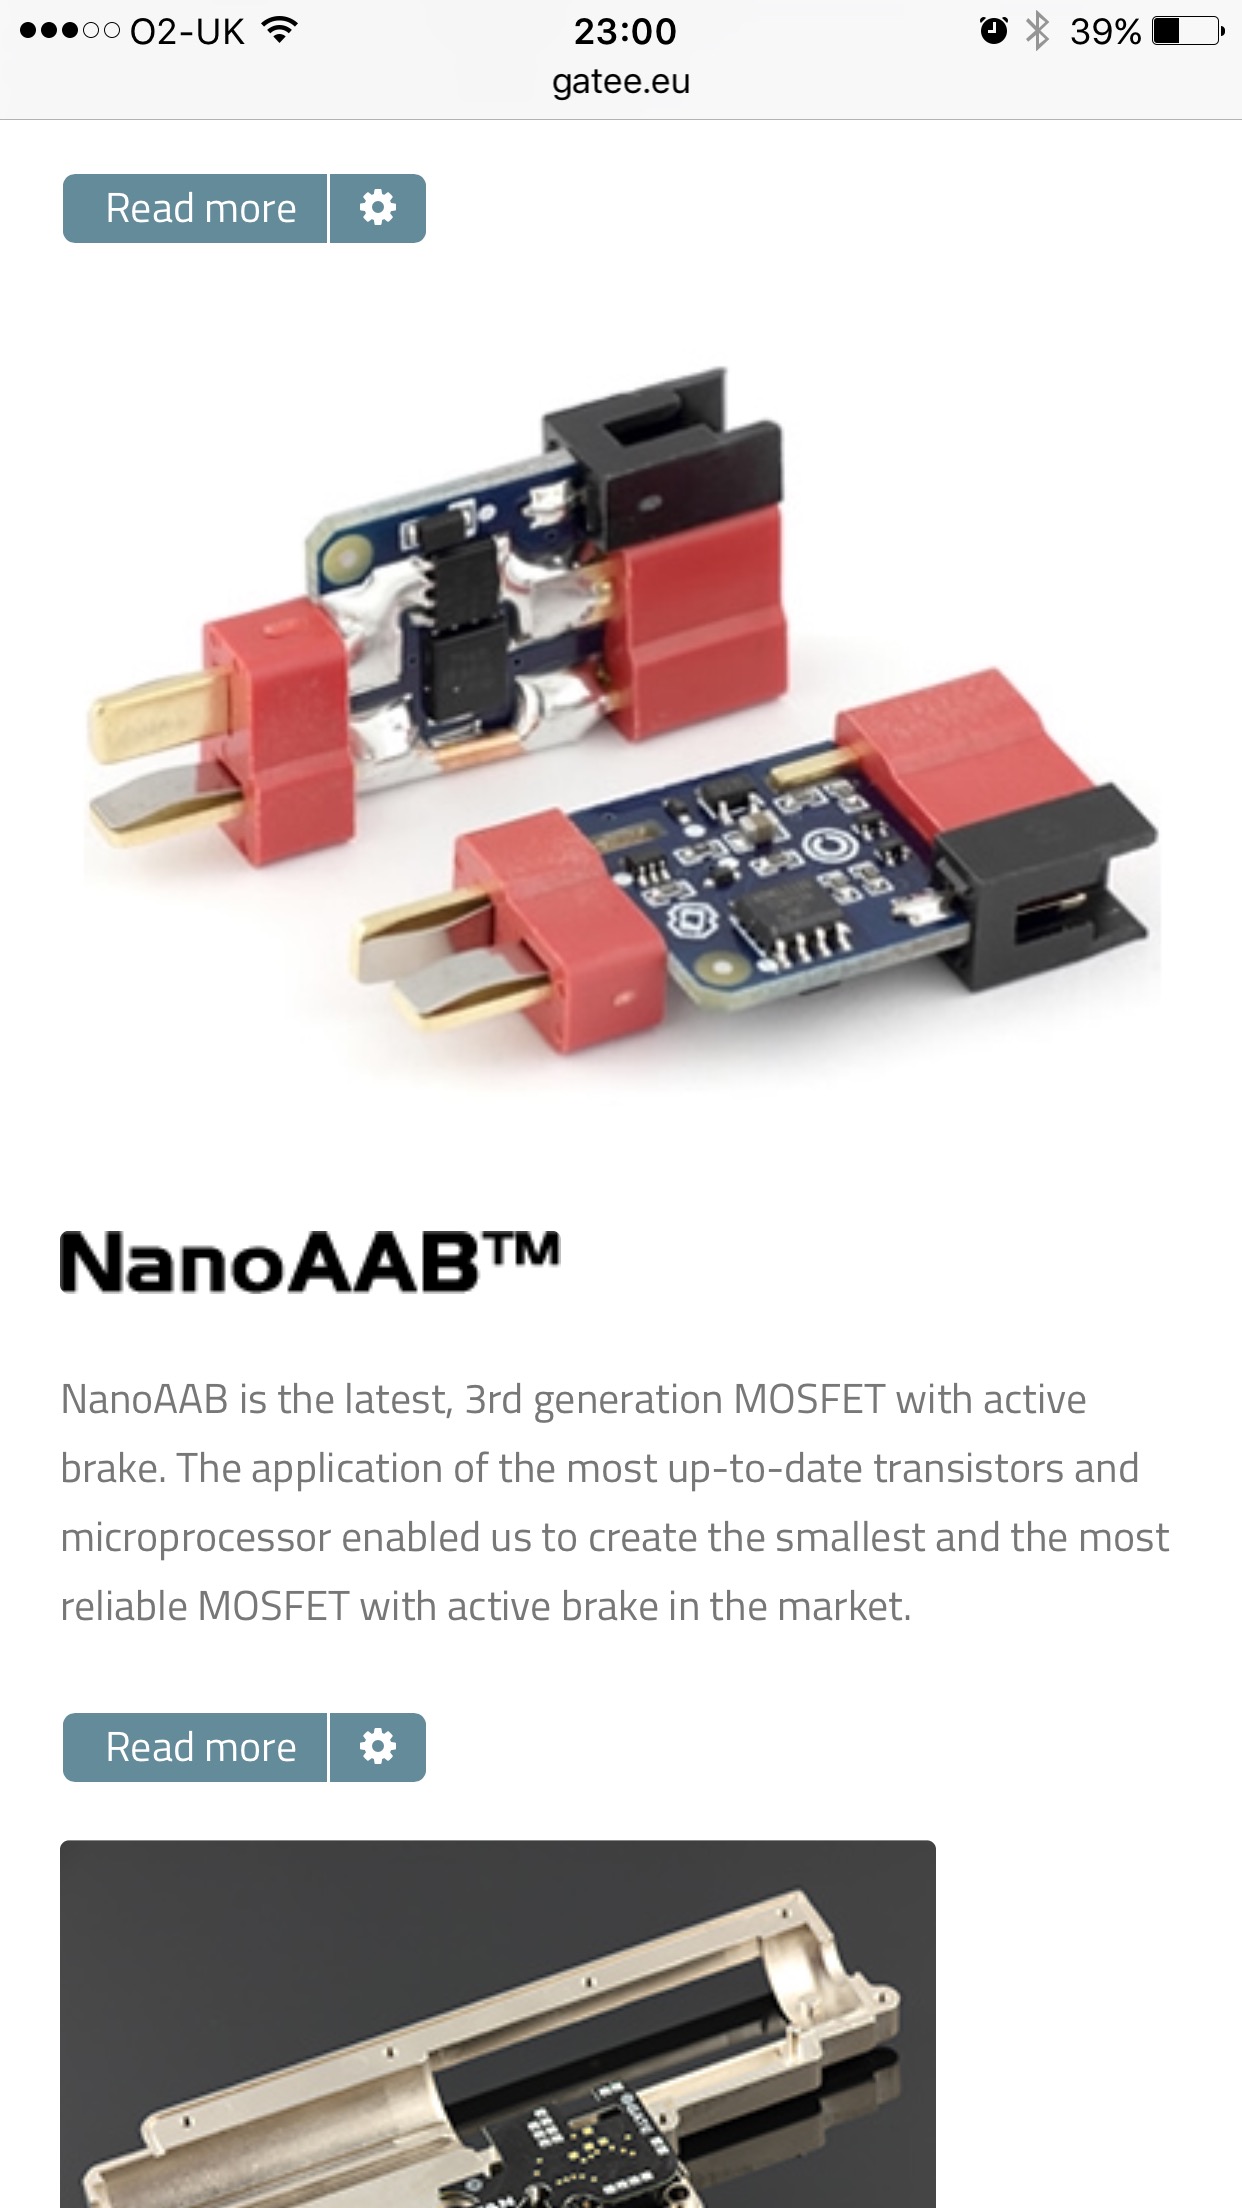
then things get interesting. Especially for a non electrical type like me.
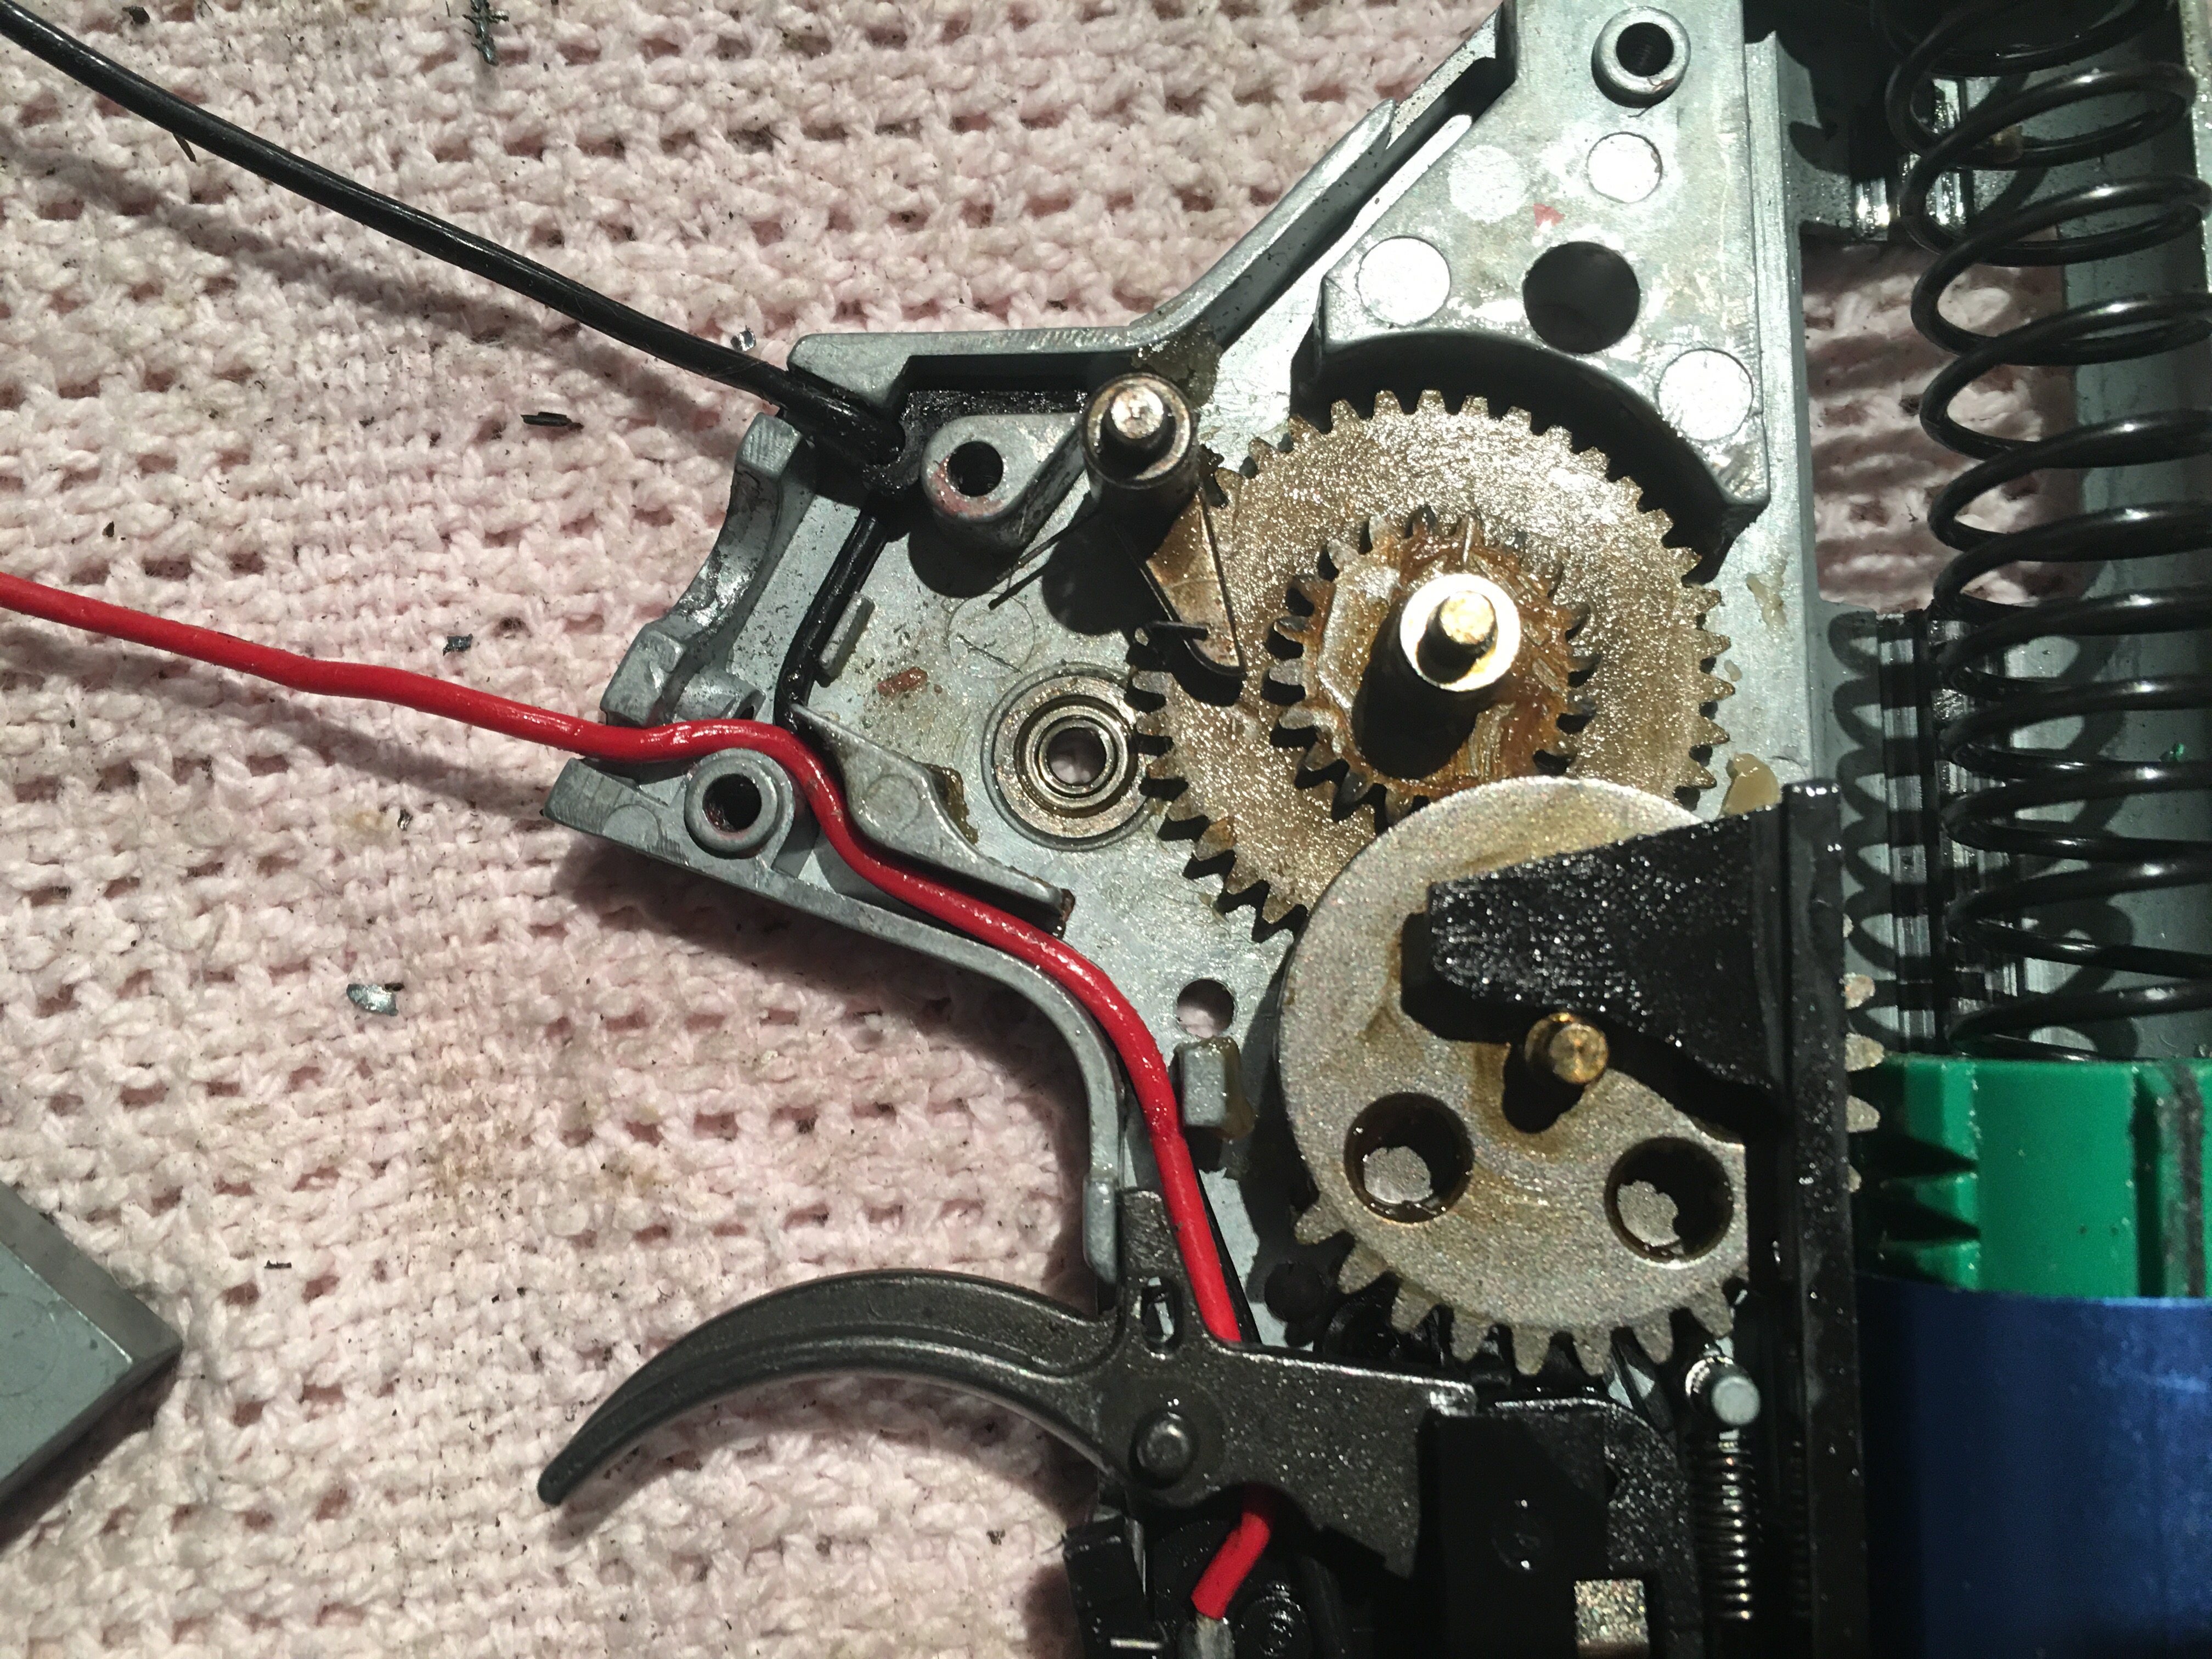
Started by taking lots and lots of pictures of the current wiring as I stripped it down to ensure I could put it all back if need be. A word or two on the strip down – bloody awful. The SRC is a very badly designed V2 piece of kit. Shame as it runs great but the take down is complicated. Gear box internals are as standard however which is good news.
This is the first time the box has been opened on my SRC and from the get go everything was clearly coated in shed loads of an unknown grease. First job – a clean down with electrical contact cleaner and a relube with a good quality synthetic grease containing PTFE. The PTFE aids in preventing what is known as stick slip in lubrication parlance. At the point of start up there is always a high level of friction between metal surfaces when they’ve been at rest. The solid PTFE keeps the surfaces separated and aids immediate start up. Not sure how much it adds to performance but the theory is sound.
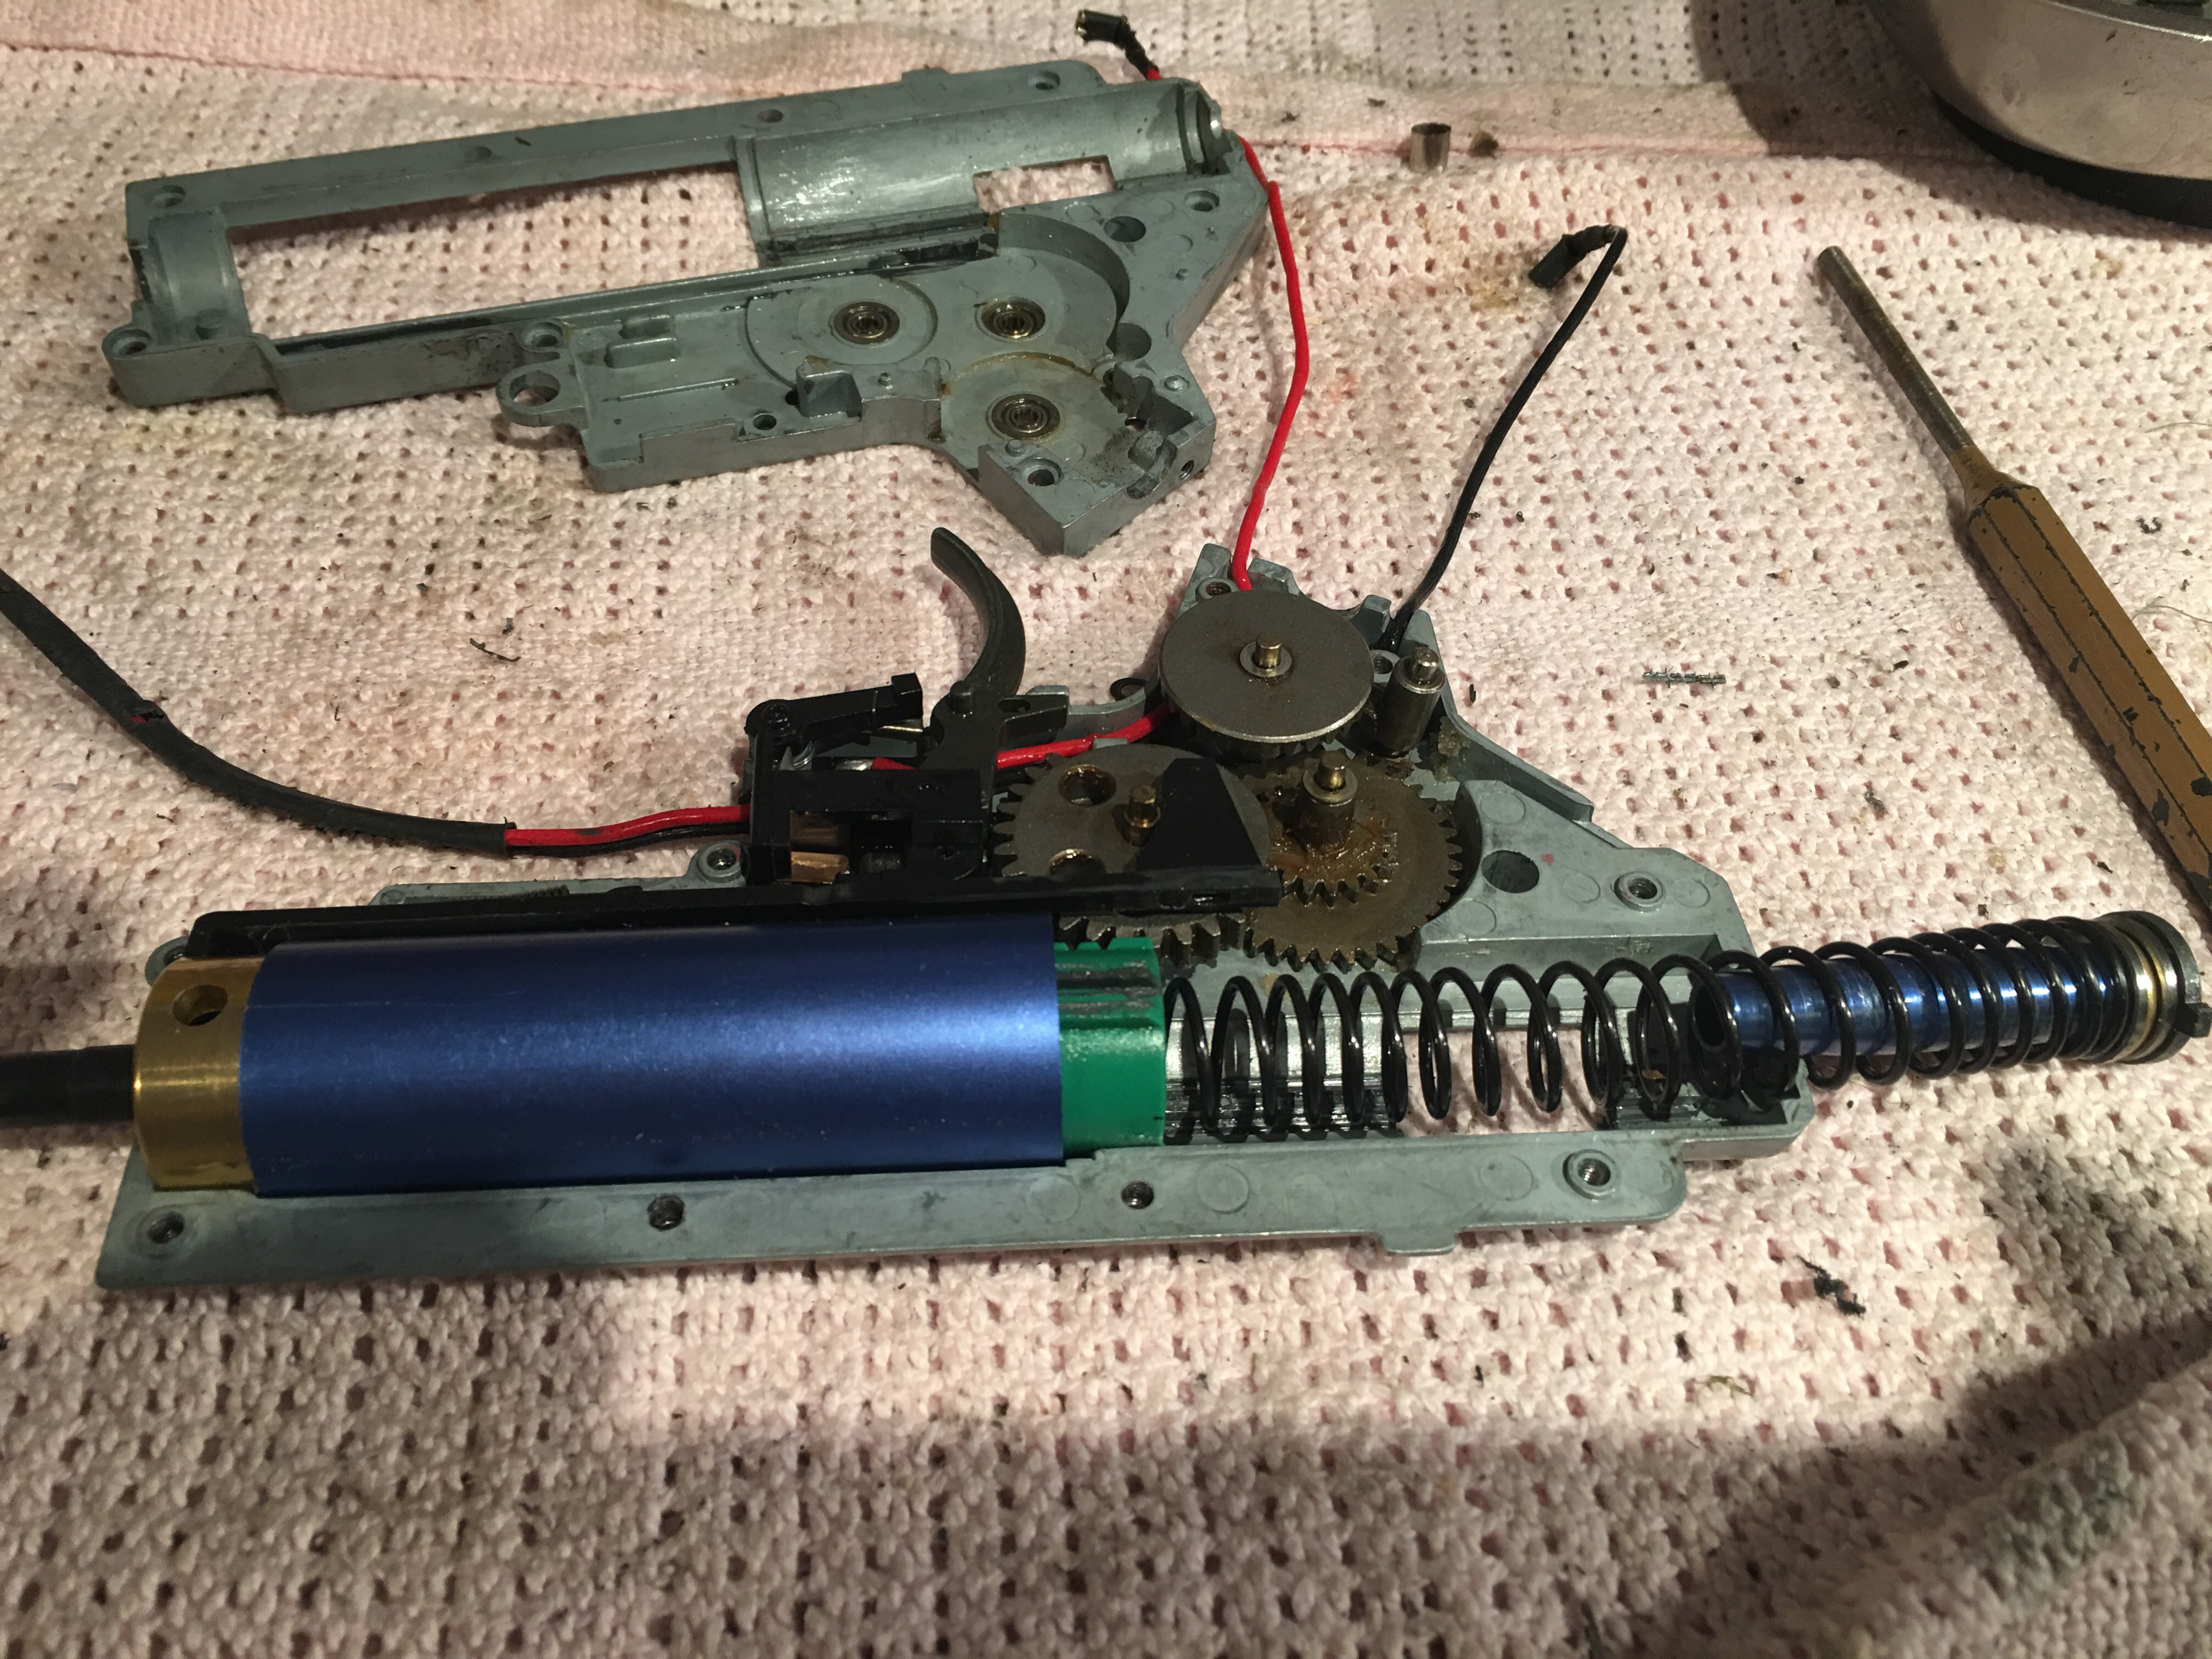
Decided to upgrade the spring at the same time and have a go at porting the piston to see what happens. It’s always been slightly underpowered so this should help.
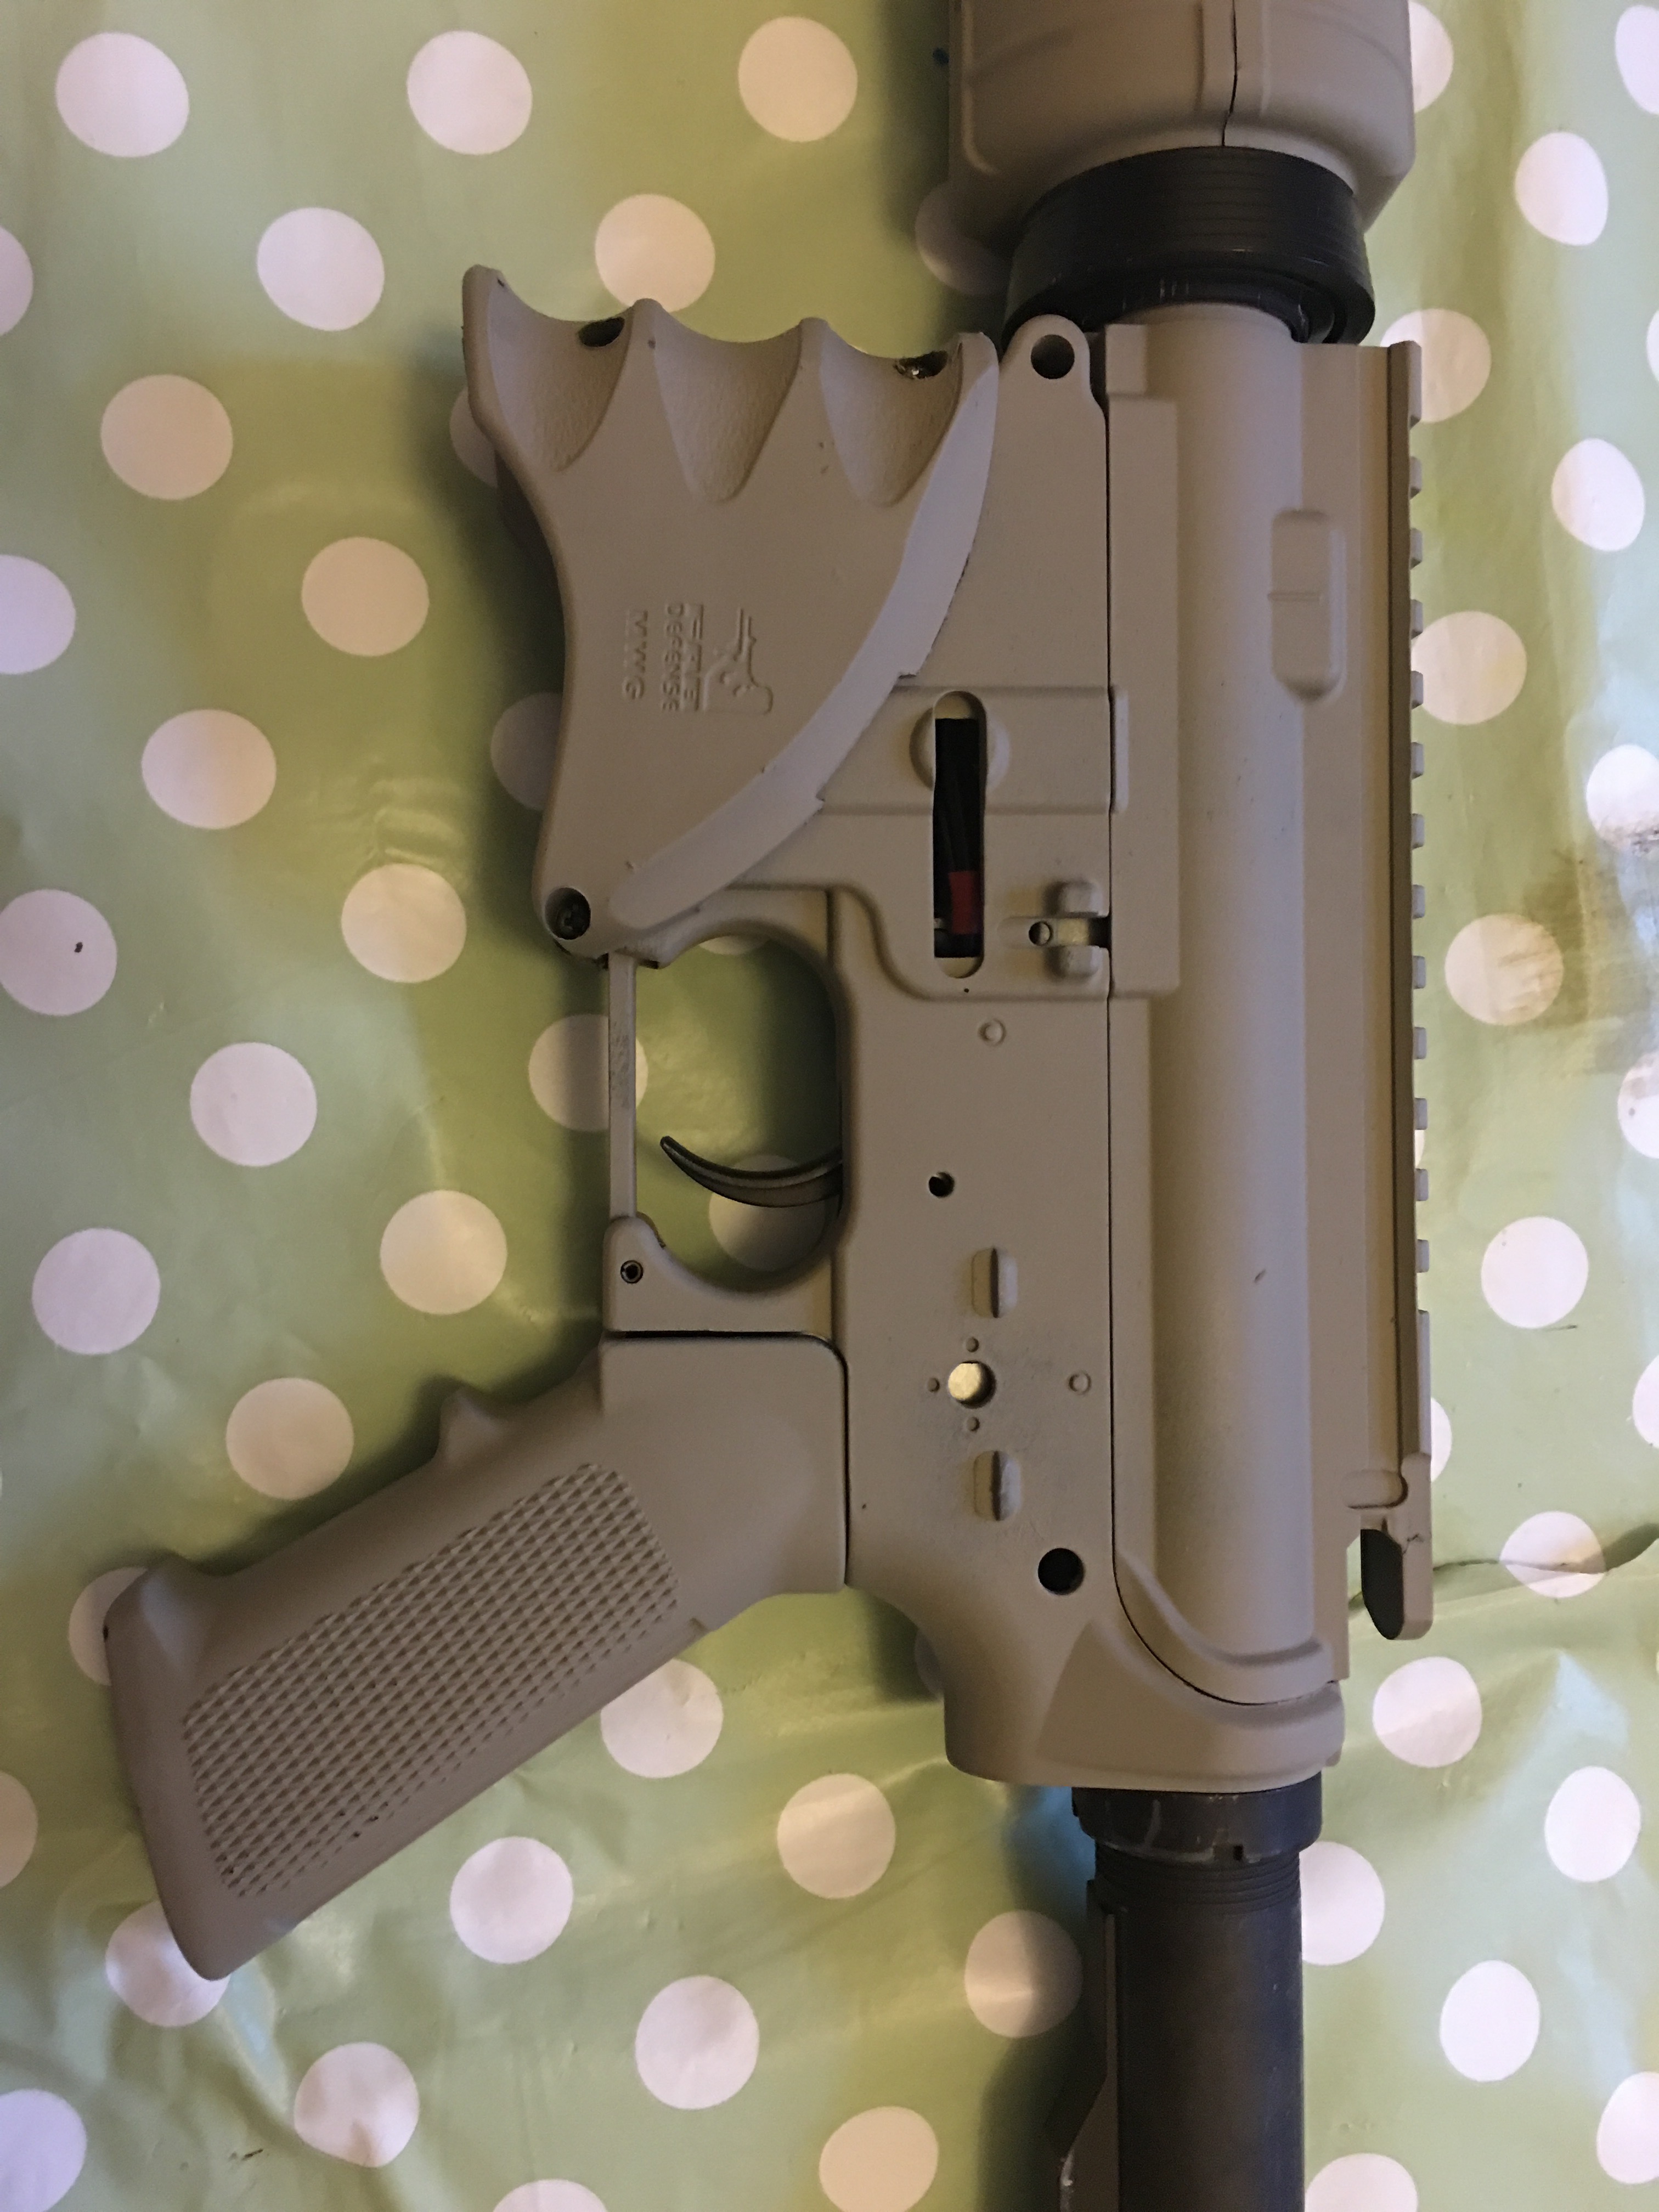
Cosmetically I’ve added a FAB defence mag well grip. Had it for ages so it’s fashionably uncool in a magpul world but I don’t care as its comfy.
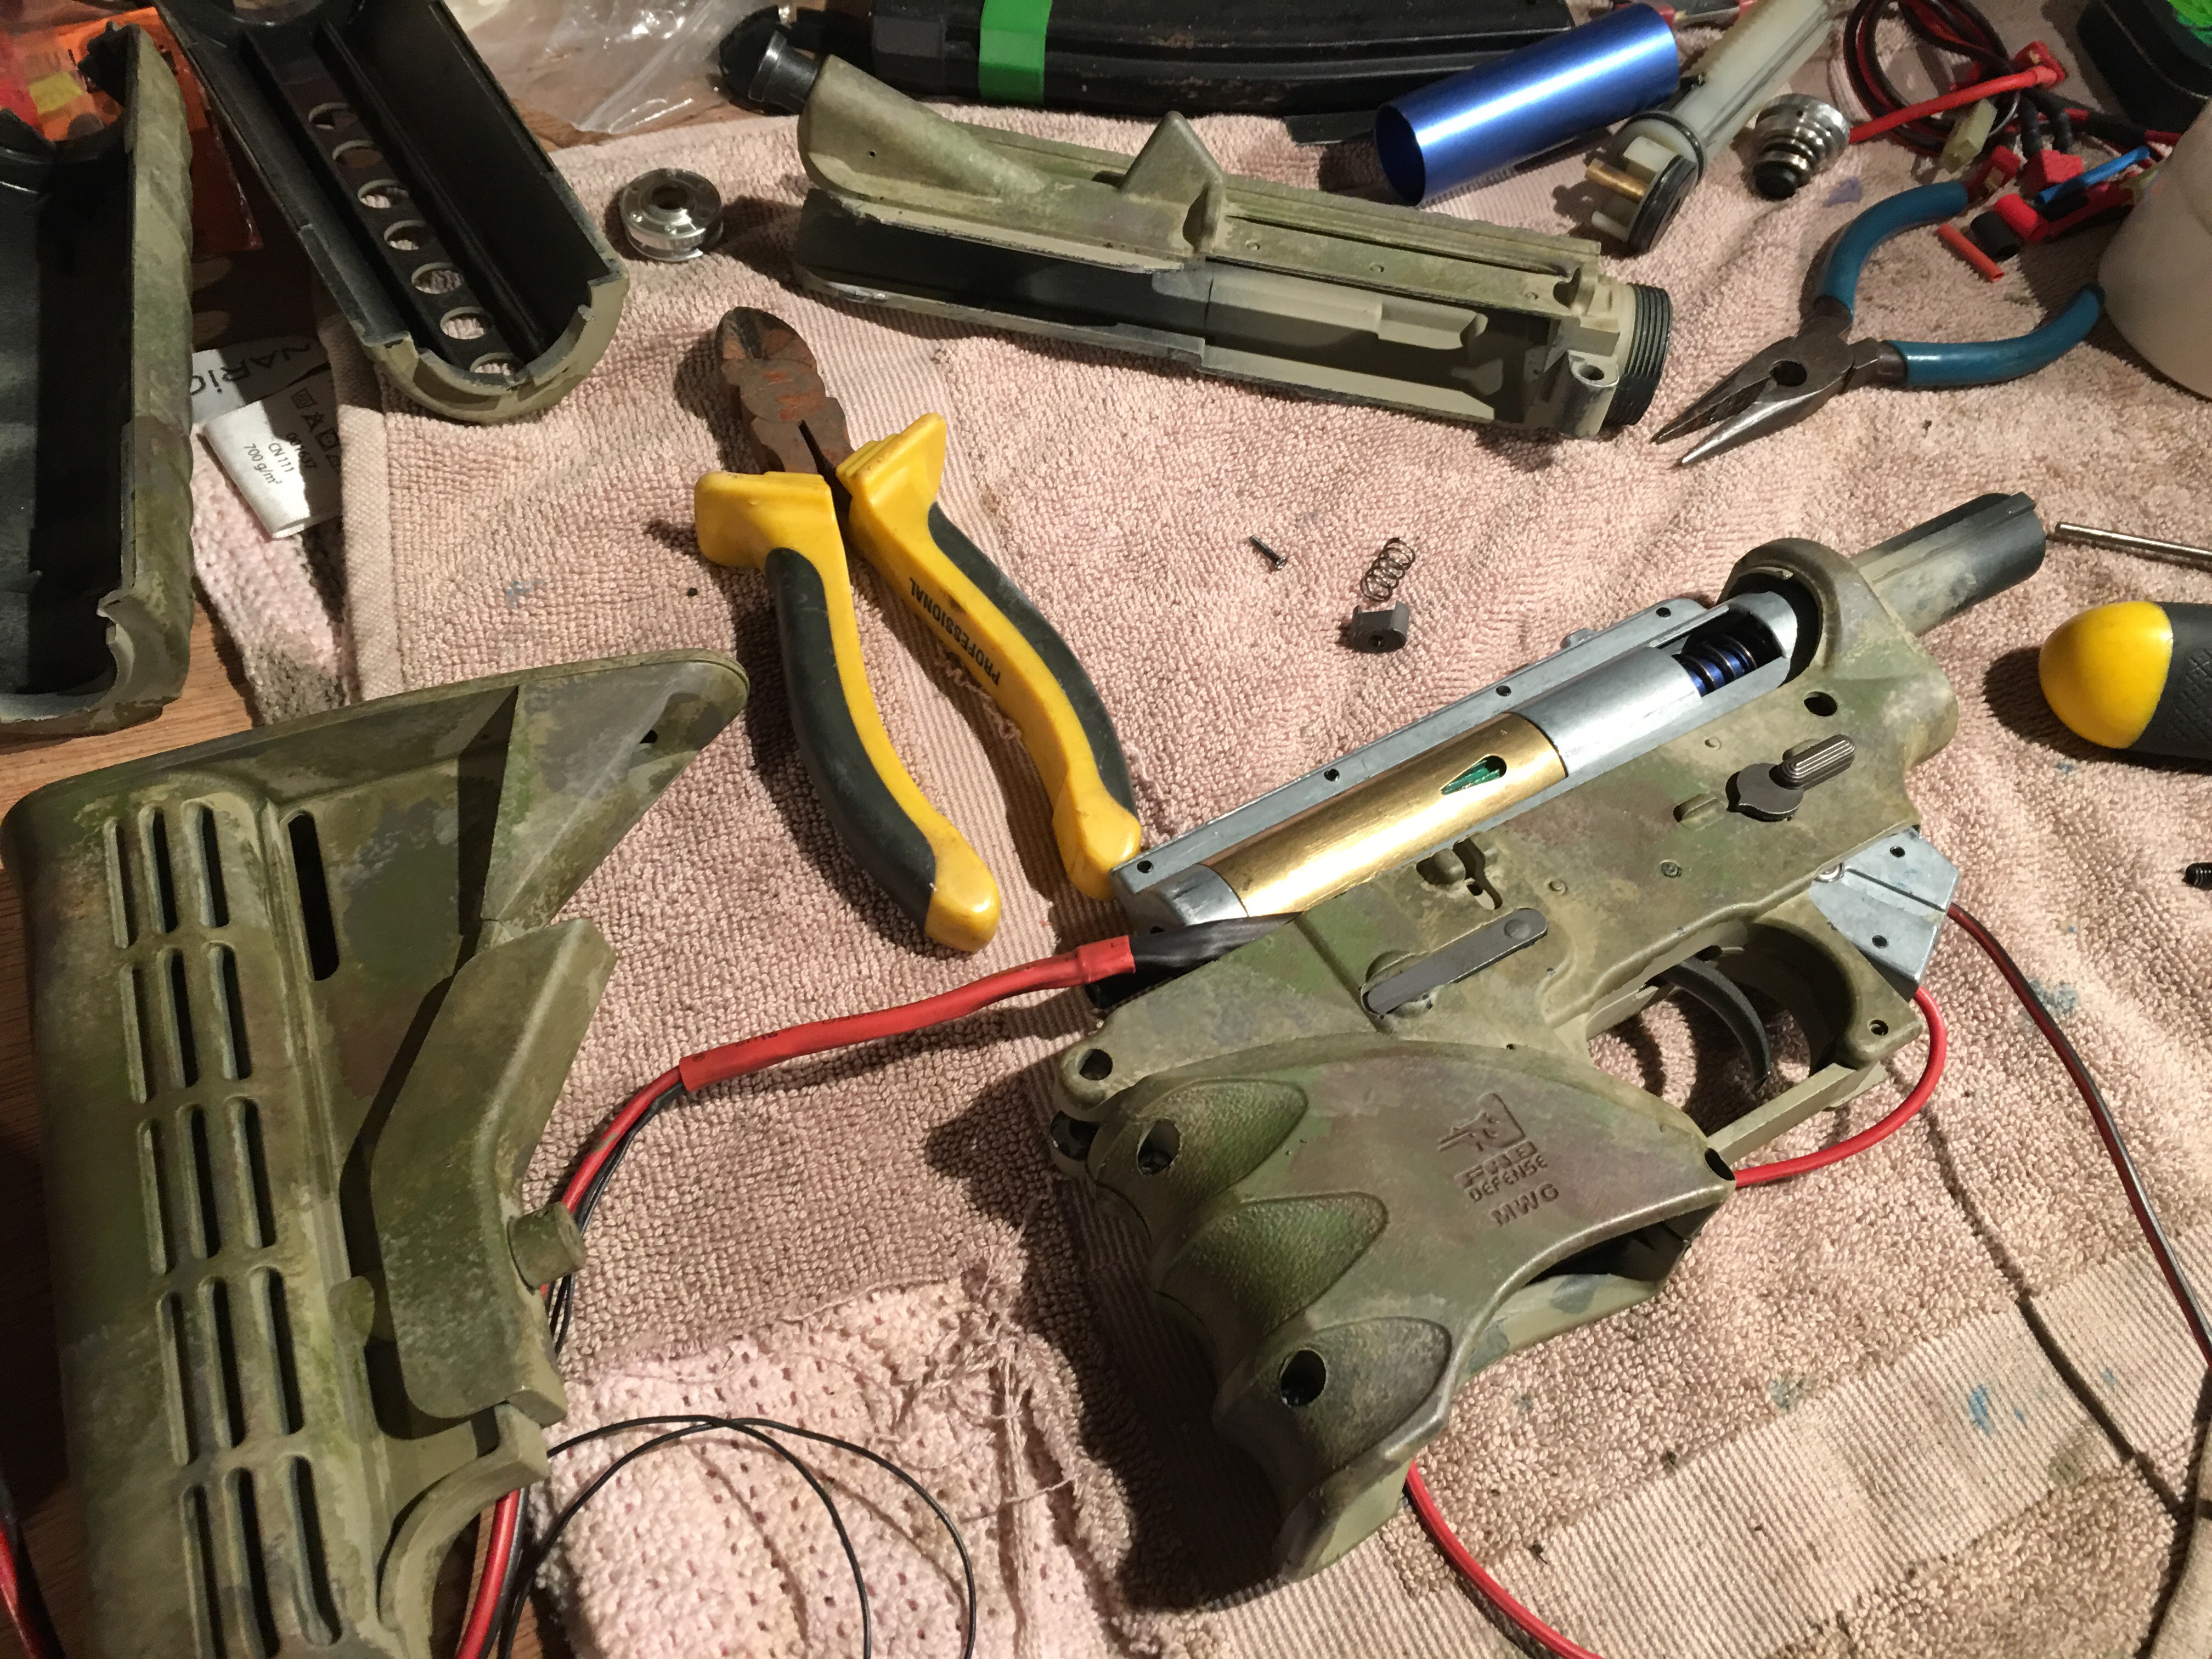
So the rewire…. Turns out that the twin core I normally use for such jobs is a tad too thick for the job. It caused a jam up between the hop unit and the upper receiver putting a twist on the hop onto barrel connection. Not good. Hmm. Still don’t like electrics. So the rebuild is on hold until the narrower gauge bendy silicone wire gets here from flea bay. Also took the opportunity to order a replacement mag catch and a CNC hop unit. In for a penny I for just over a few quid in this case. Money well spent. Stay tuned.
Off I went…
Not often I get to buy new gear at the moment, so after first having had a few goes on Derkas Ares Vz58 I made the trip south to Patrol Base to make the purchase. I know if you’re prepared to hunt around you can probably knock a tenner off, but there is still something I like about going to a shop, picking out the one I want and leaving with it.
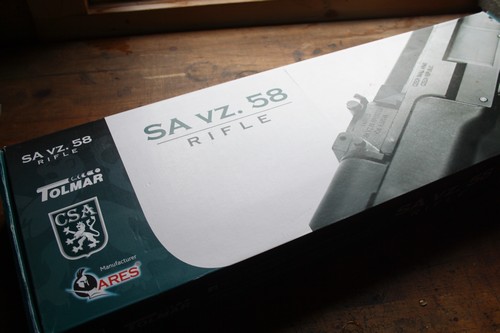
Everyone loves a new gun!
Some comments on Patrol Base. It’s easy enough to find and we had no trouble parking up. Once inside its a spacious shop with plenty of stock. The guys were very enthusiastic even letting me shoot off a few rounds on the display model they had on show in their test range. My only proviso was they tried to sell me a battery they insisted fitted, and only the fact that I had experience of actually using a VZ58 made me cautious. When I said fine if they could fit it for me I’d buy 2 did they concede (after much trying) that none of their batteries in stock fitted. More of the batteries later though…
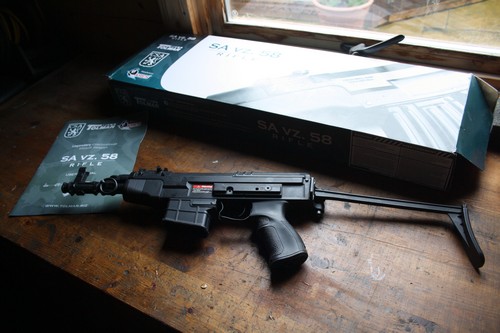
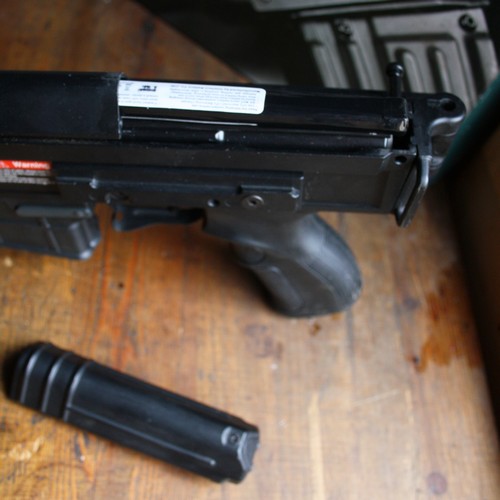
Almost fresh out of the box…
As the Ares website highlights, the VZ58 series comes with a propriety mag which are about £30 each at the moment, and you can see I went for the compact version. For those who like to read up on the real world counterparts there’s some info here.
Also in the box were cleaning rods, mag loader, and some reasonably decent instructions. Read them! No batteries of any kind, which I don’t mind as they’re usually inferior and never get used in any case.
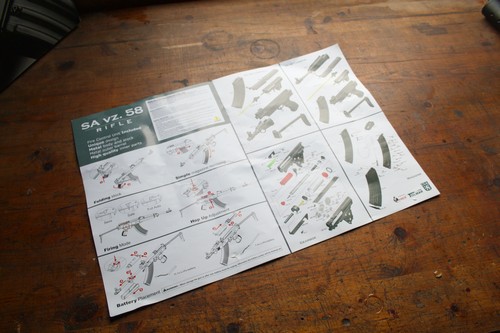
Read them! You never know…
I added a few modifications to my initial purchase. First up and probably most pragmatic was the magazine adapter to allow the VZ58 to accommodate M4 type mags. This gives you access to a far wider variety and they tend to be cheaper!
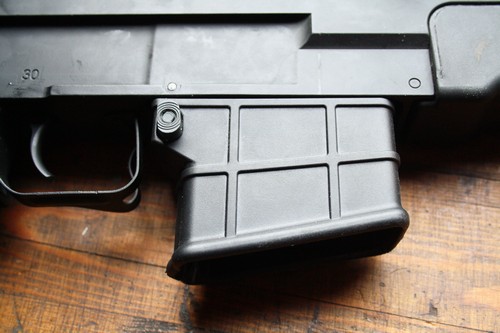
Mag well adapter for all those M4 mags you already have!
Next up was a suppressor, reasonably short and simple dual ended type. Primarily because I liked the look of it, but having skirmished the VZ58 now it definitely mutes the noise of the gearbox taking a lot of the sharpness out of it. It turns it into a satisyingly solid thump rather than a crack and seems to be harder to position from any sort of distance.
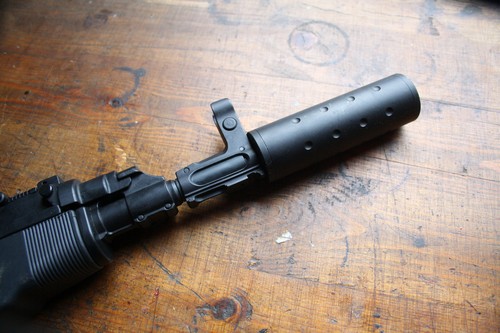
extra sneakiness fitted….
Lastly for now was the quick release sidemount attachment that allows me to use the QR sidemount from my AK105. Fitting was a matter of minutes allowing the VZ to mount a toprail for scope and sights. This top rail does make fitting the battery more fiddly so be warned!
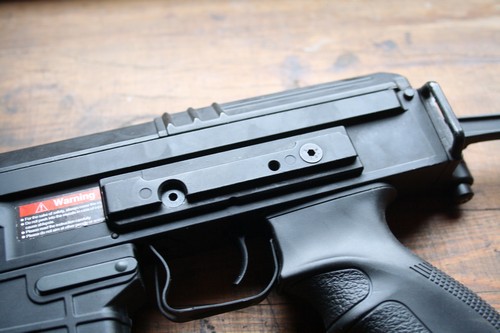
QR sidemount ready!
The ring for attaching sligs is definitely robust and feels secure. After the somewhat flimsy affairs on the side of some CYMA AK’s this was a welcome find.
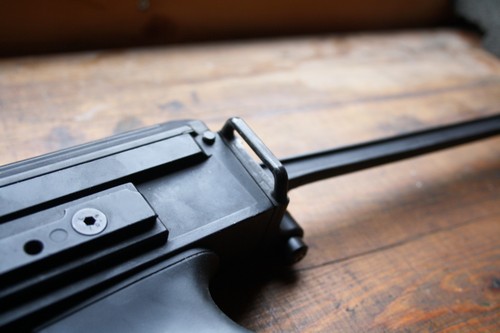
Why aren’t all guns fitted with one of these?
..and of course it has a folding stock, with the stock folding to the right so you can still make use of the QR sidemount and access the selector switch with ease.
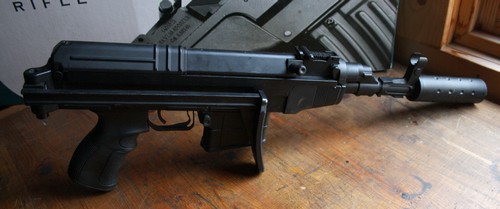
Even shorter…
However!
This brings me to a definite gripe. The folding stock relies on a screwcap retaining a small spring over the pin in the hinge. I was warned by other owners this would be loose and to get some threadlock on it immediately. Like an idiot I hadn’t got round to it before I skirmished it the first time. The VZ didn’t even make it past the safety brief before this pinged it’s way across the carpark. Why they seem unable to secure this I have no idea. Sheer dogged luck and some very helpful friends enable me to find the escaped parts (and they go a long way) and it was replaced having been smothered in threadlock. I may look into a more permanent securing pin mod at a later date.
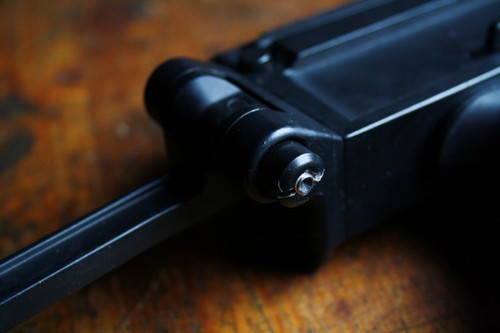
PAY ATTENTION! THREADLOCK THIS BIT!
Power it up!
Right. Batteries. The only batteries I can find that currently fit the recived space are G&P 7.4v lipo at the moment. You can get them on the usual popular auction site from overseas, but I also recommend checking out our pyro supplier Jack Rabbit who have supply at wholesale prices here in Blighty. Replacing them can be fraught so here’s my best method so far…
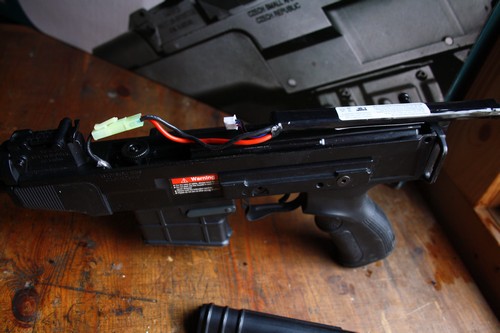
Step 1 slide pin to unsecure rear of top receiver
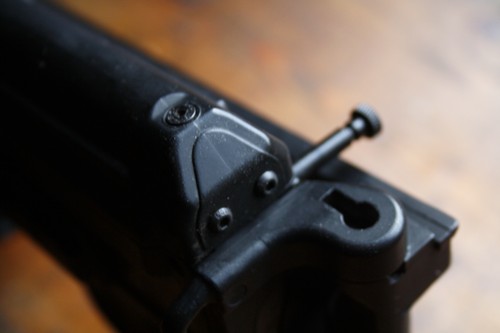
Battery step 1
Step 2 remove the receiver top completely.
Battery step 2
Step 3 move the cocking handle rearwards
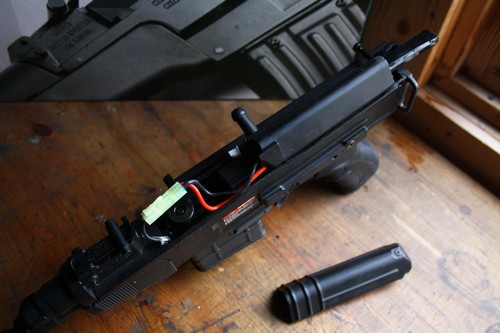
Battery Step 3
Step 4 remove the cocking handle reciever section as well to permit access to the battery with ease.
Battery Step 4
I find it easiest to lay the new battery in position carefully and essentially go through all the above procedures in reverse to fit. BE WARNED it remains a tight fit, be wary of trapping wires and damaging LiPo batteries when doing so!
But having done all this you are presented with a tidy tight and refreshingly rattle free AEG. Having skirmished it once I can assure that the electronic programmable gearbox seems to work well. using 7.4v LiPo gives it more than fast enough rate of fire, although I tend to leave it in semi. (see our video from the last game day report. I intend to program this to either a 3 shot burst or semi auto only at a later date, so I’ll update the performance then.
In action I found it beautifully nimble and accurate for it’s size. Power was dead on 326 fps out of the box (1 Joule) so no need to be using the quick access for the spring just yet that the current Ares AEG come fitted with.
Pros
Solid
Small size makes it agile (ideal CQB)
Good range on stock hop set up
Perfectly powered out of box
Can take standard mags with adapter
Cons
Make sure stock hinge is secured properly!
Battery compartment is small and fiddly
Overall? A cracking little AEG. I mean, just look at it...
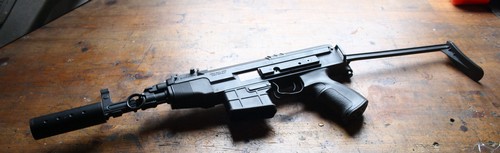
Admit it, you want one now don’t you?…
Costs…
VZ58 Compact £192
Mag Adapter £29.99
Suppressor £10
plus I went for some additional Ares Amoeba mid cap 140rd M4 magazines at £9.99
G&P 7.4v LiPo batteries £25
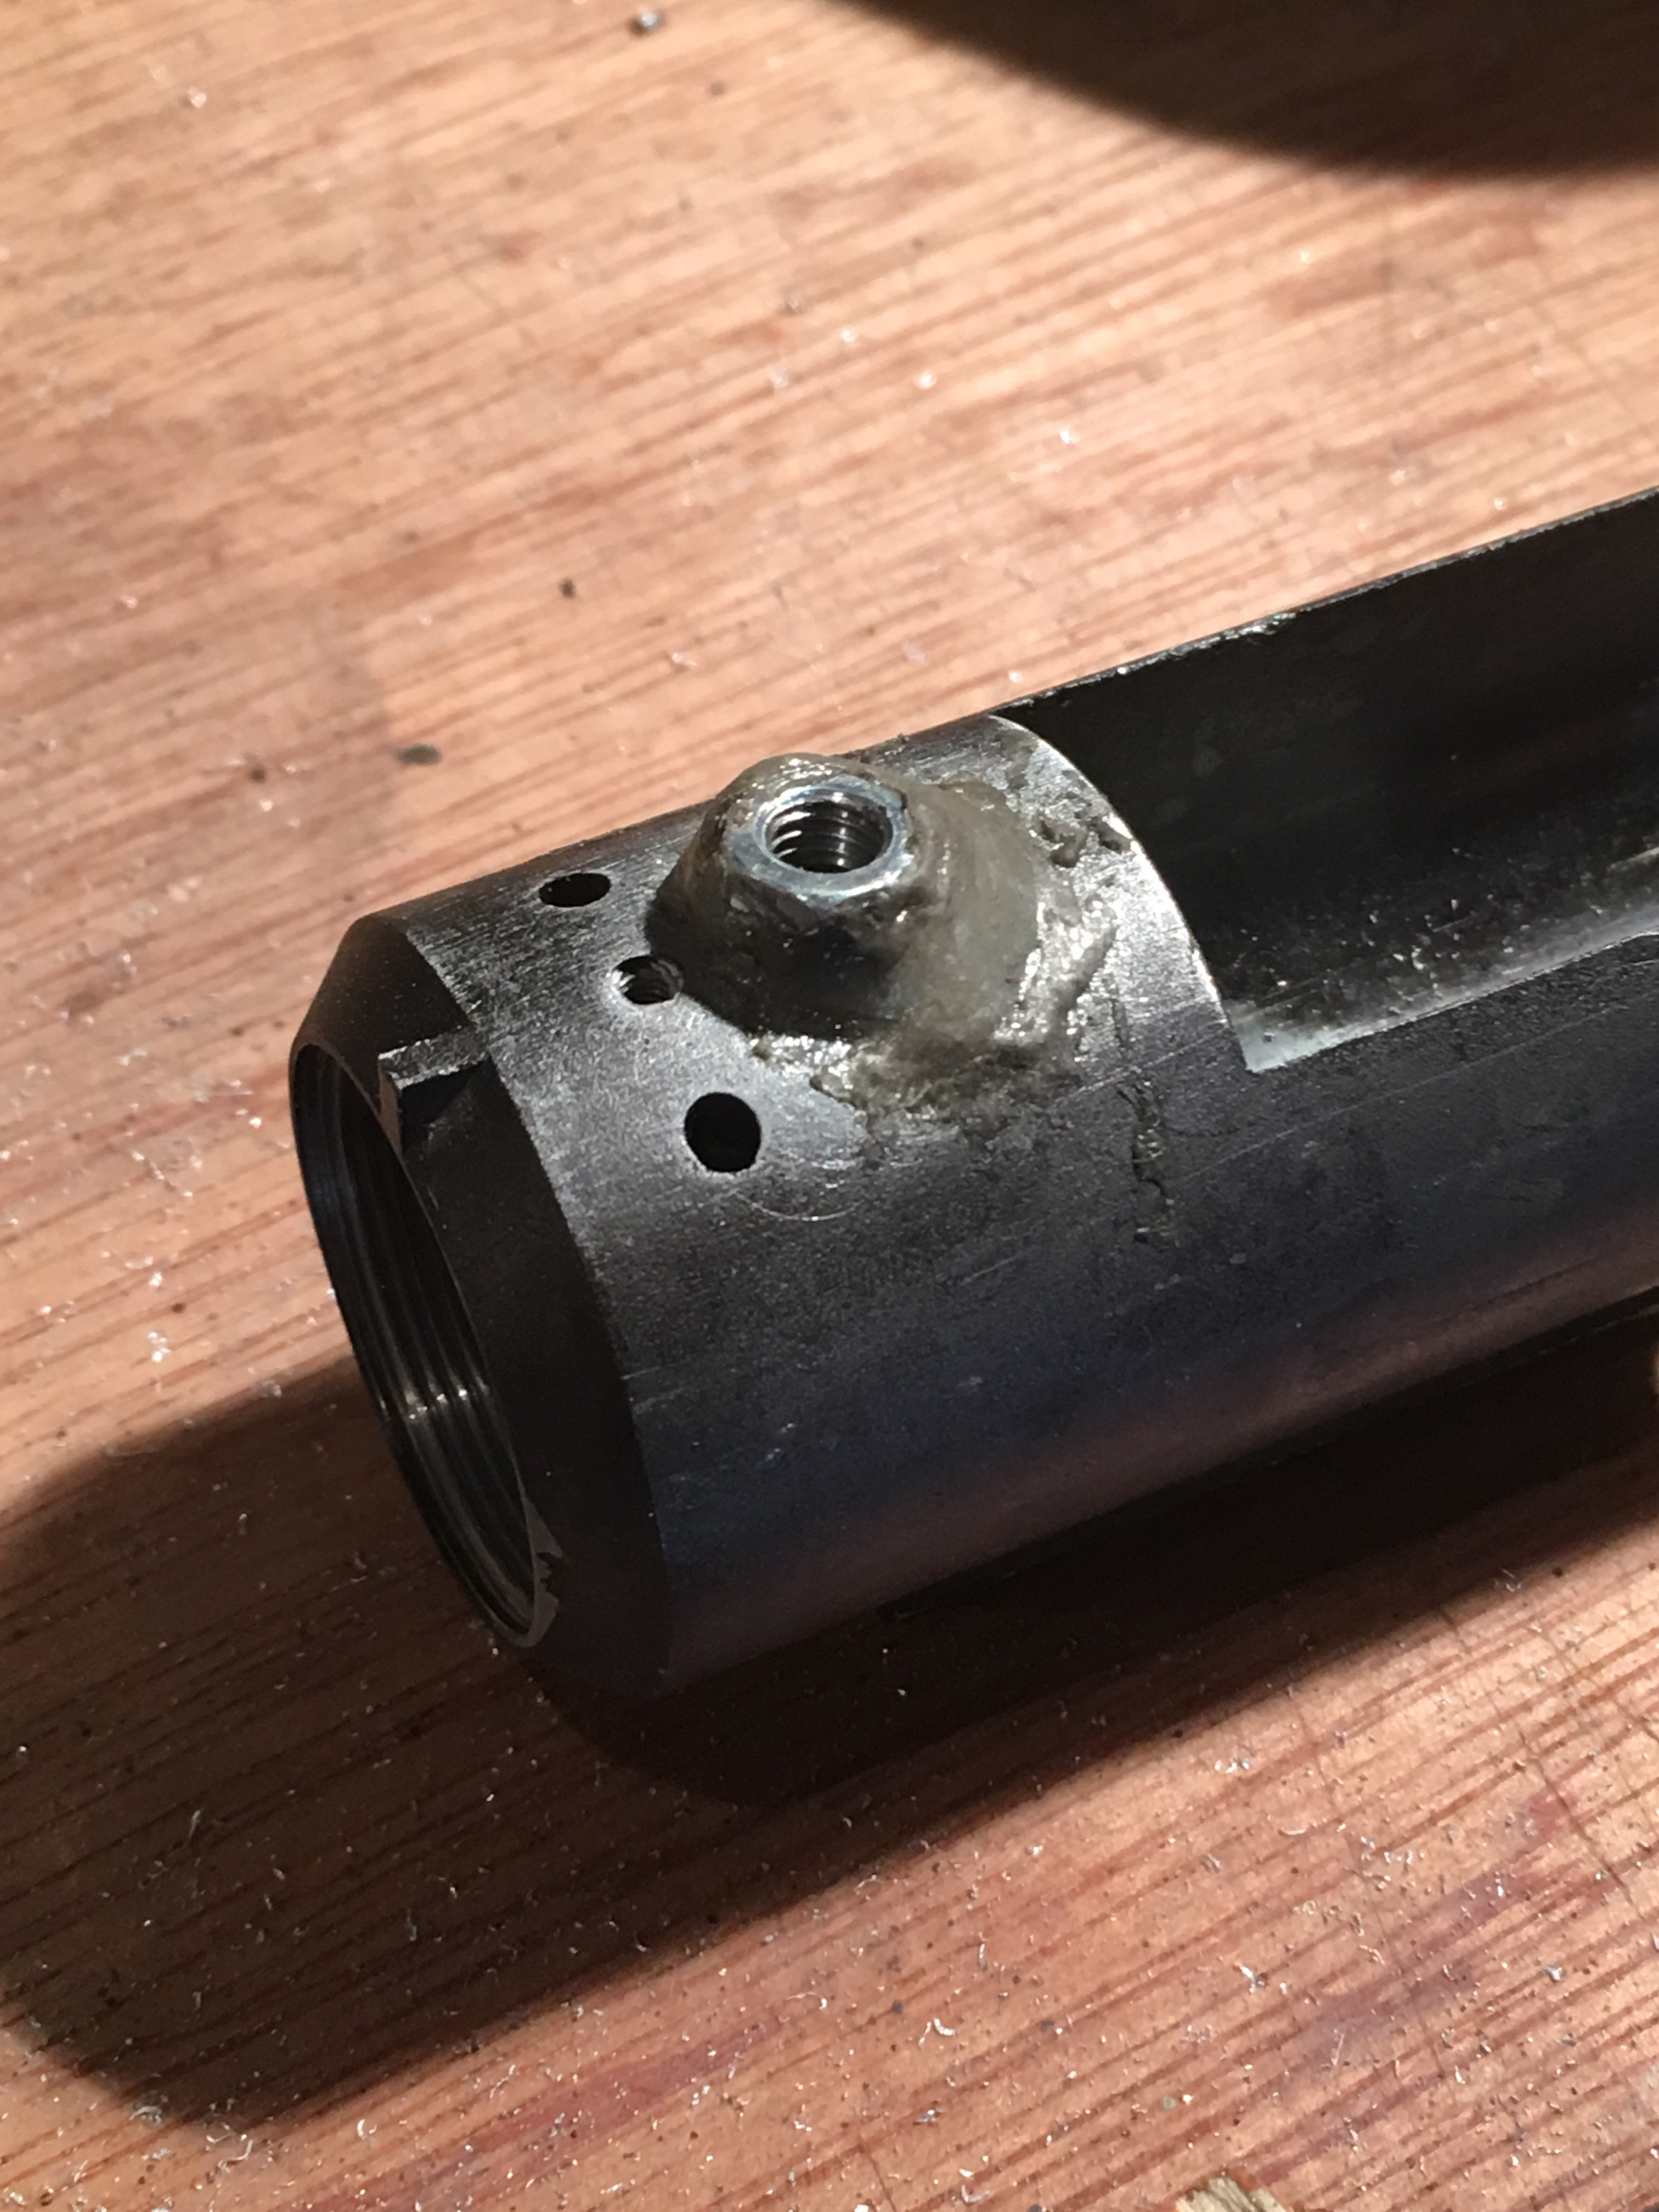
After a bit of a strip down and a clean my 96 was playing up a bit. The symptoms were the bolt was very stiff going forwards and backwards, sometimes jamming up.
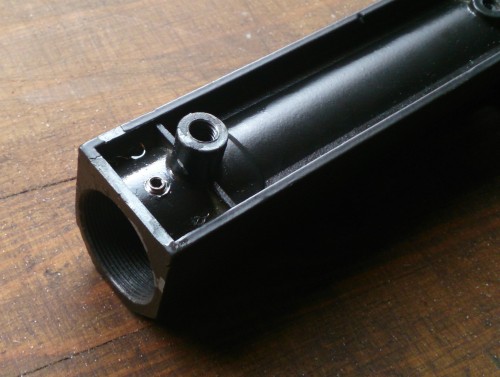
After carefully checking the grub screws in the otherwise excellent pdi hop unit which can protrude into the nozzle grove if not careful and obstruct the last 20mm of movement in the bolt, I managed to eventually pin down the issue.
Essentially a grub screw which secures the outer barrel to breech block needed to be so tight that it was deforming the outer barrel. This was because over time the thread had worn and the screw needed to be really wound in to get purchase.
The remedy!
First up, a slightly larger grub screw (M3 in this case) fitted (see below) tapping the hole out to receive it. You could probably do this by just winding the screw in carefully to the block as it’s fairly soft metal. (remember to keep backing off and use lubricant – ooer missus!). Then simply cut the grub screw to length required.
Next up, you can see the damage done to the outer barrel here. This was evident inside as well with a pimple forming that was preventing bolt movement. Bit of patient use with a dremel or round file sorts this (and if you can be bothered a polishing wheel on the dremel to finish off the inside and make it slide smoothly in and out… No this is not scripted by Frankie Howard)
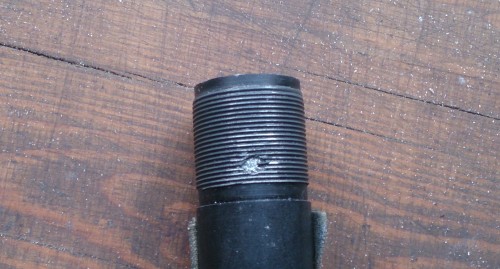
That should do it…
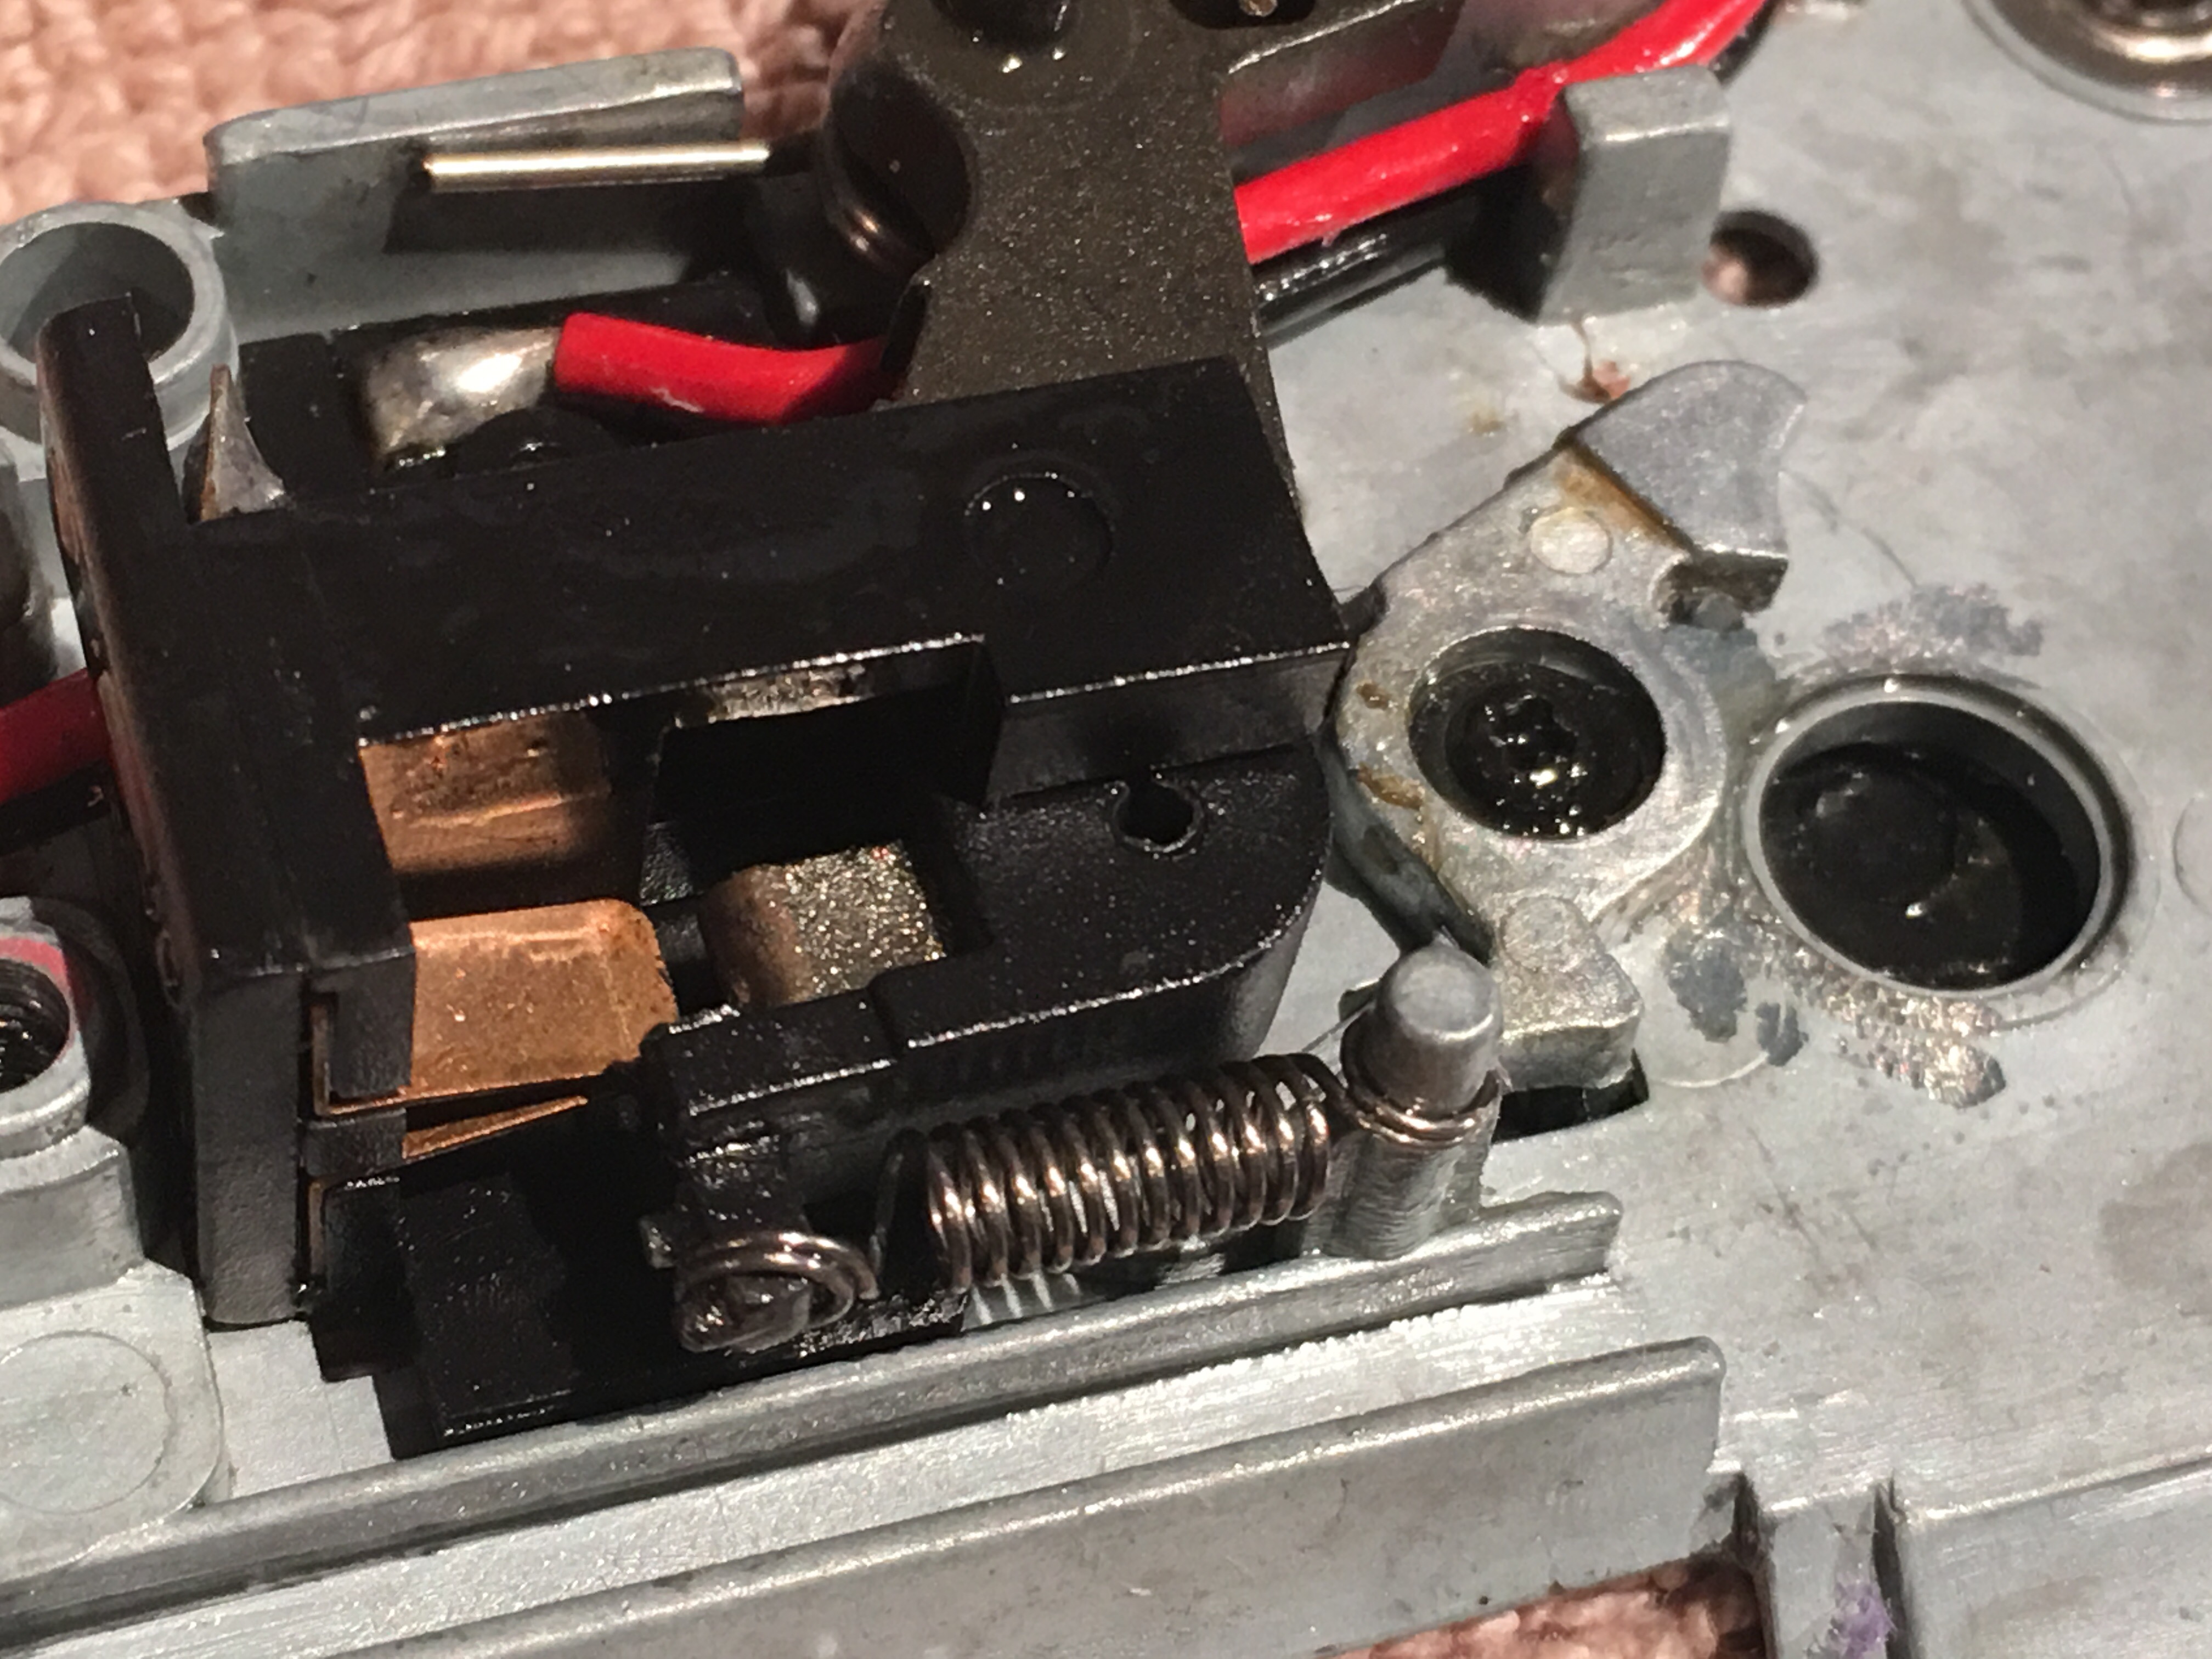
Whilst it was apart I grabbed a photo of the set pin mod. This failed a while ago when a stronger spring was fitted. (Originally a Well MB01, about 6 years ago!). Rather than payout £150+ for a laylax trigger block I found a piece of key steel (the part between door handles works well) followed by a bit of measuring, a hacksaw and some finishing off on a grinding wheel (a file would do just as well) and voila, you have a bomb proof set pin for about an hours work and about 2.5% of the cost!
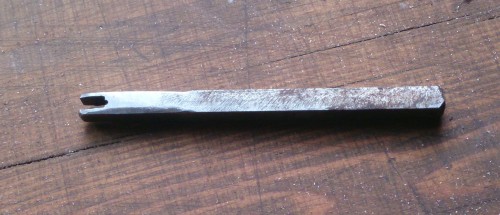
Hope this helps at some point!
